

prompt_id. If a prompt has a model attached, you can even use the prompt ID directly as the model in your request.
Open the Prompt Library in the Requesty Console.
Prompts List
The prompts list gives you a searchable overview of every prompt in your organization.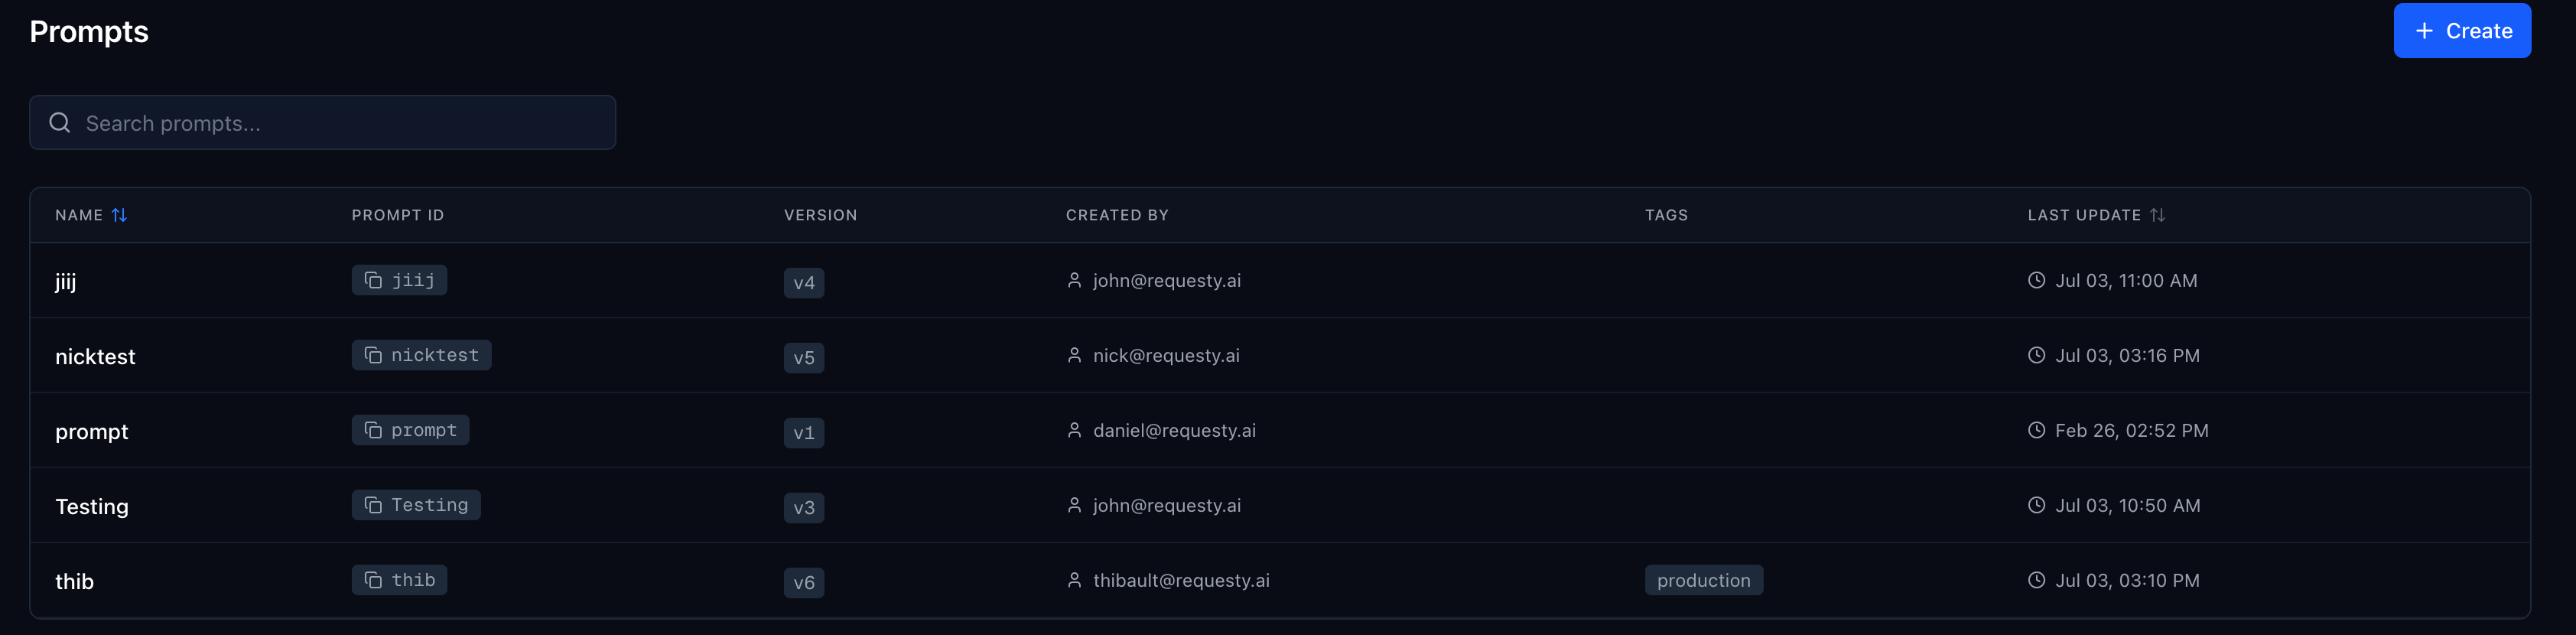
Use the search bar to filter by name, tag, or creator email. Click + Create to start a new prompt, or click any row to open the editor.
Prompt Editor
The editor is where you build and refine your prompt templates. It supports multiple messages, an attached model, model parameters, response formats, template variables, tags, and three view modes: Pretty, JSON, and Diff.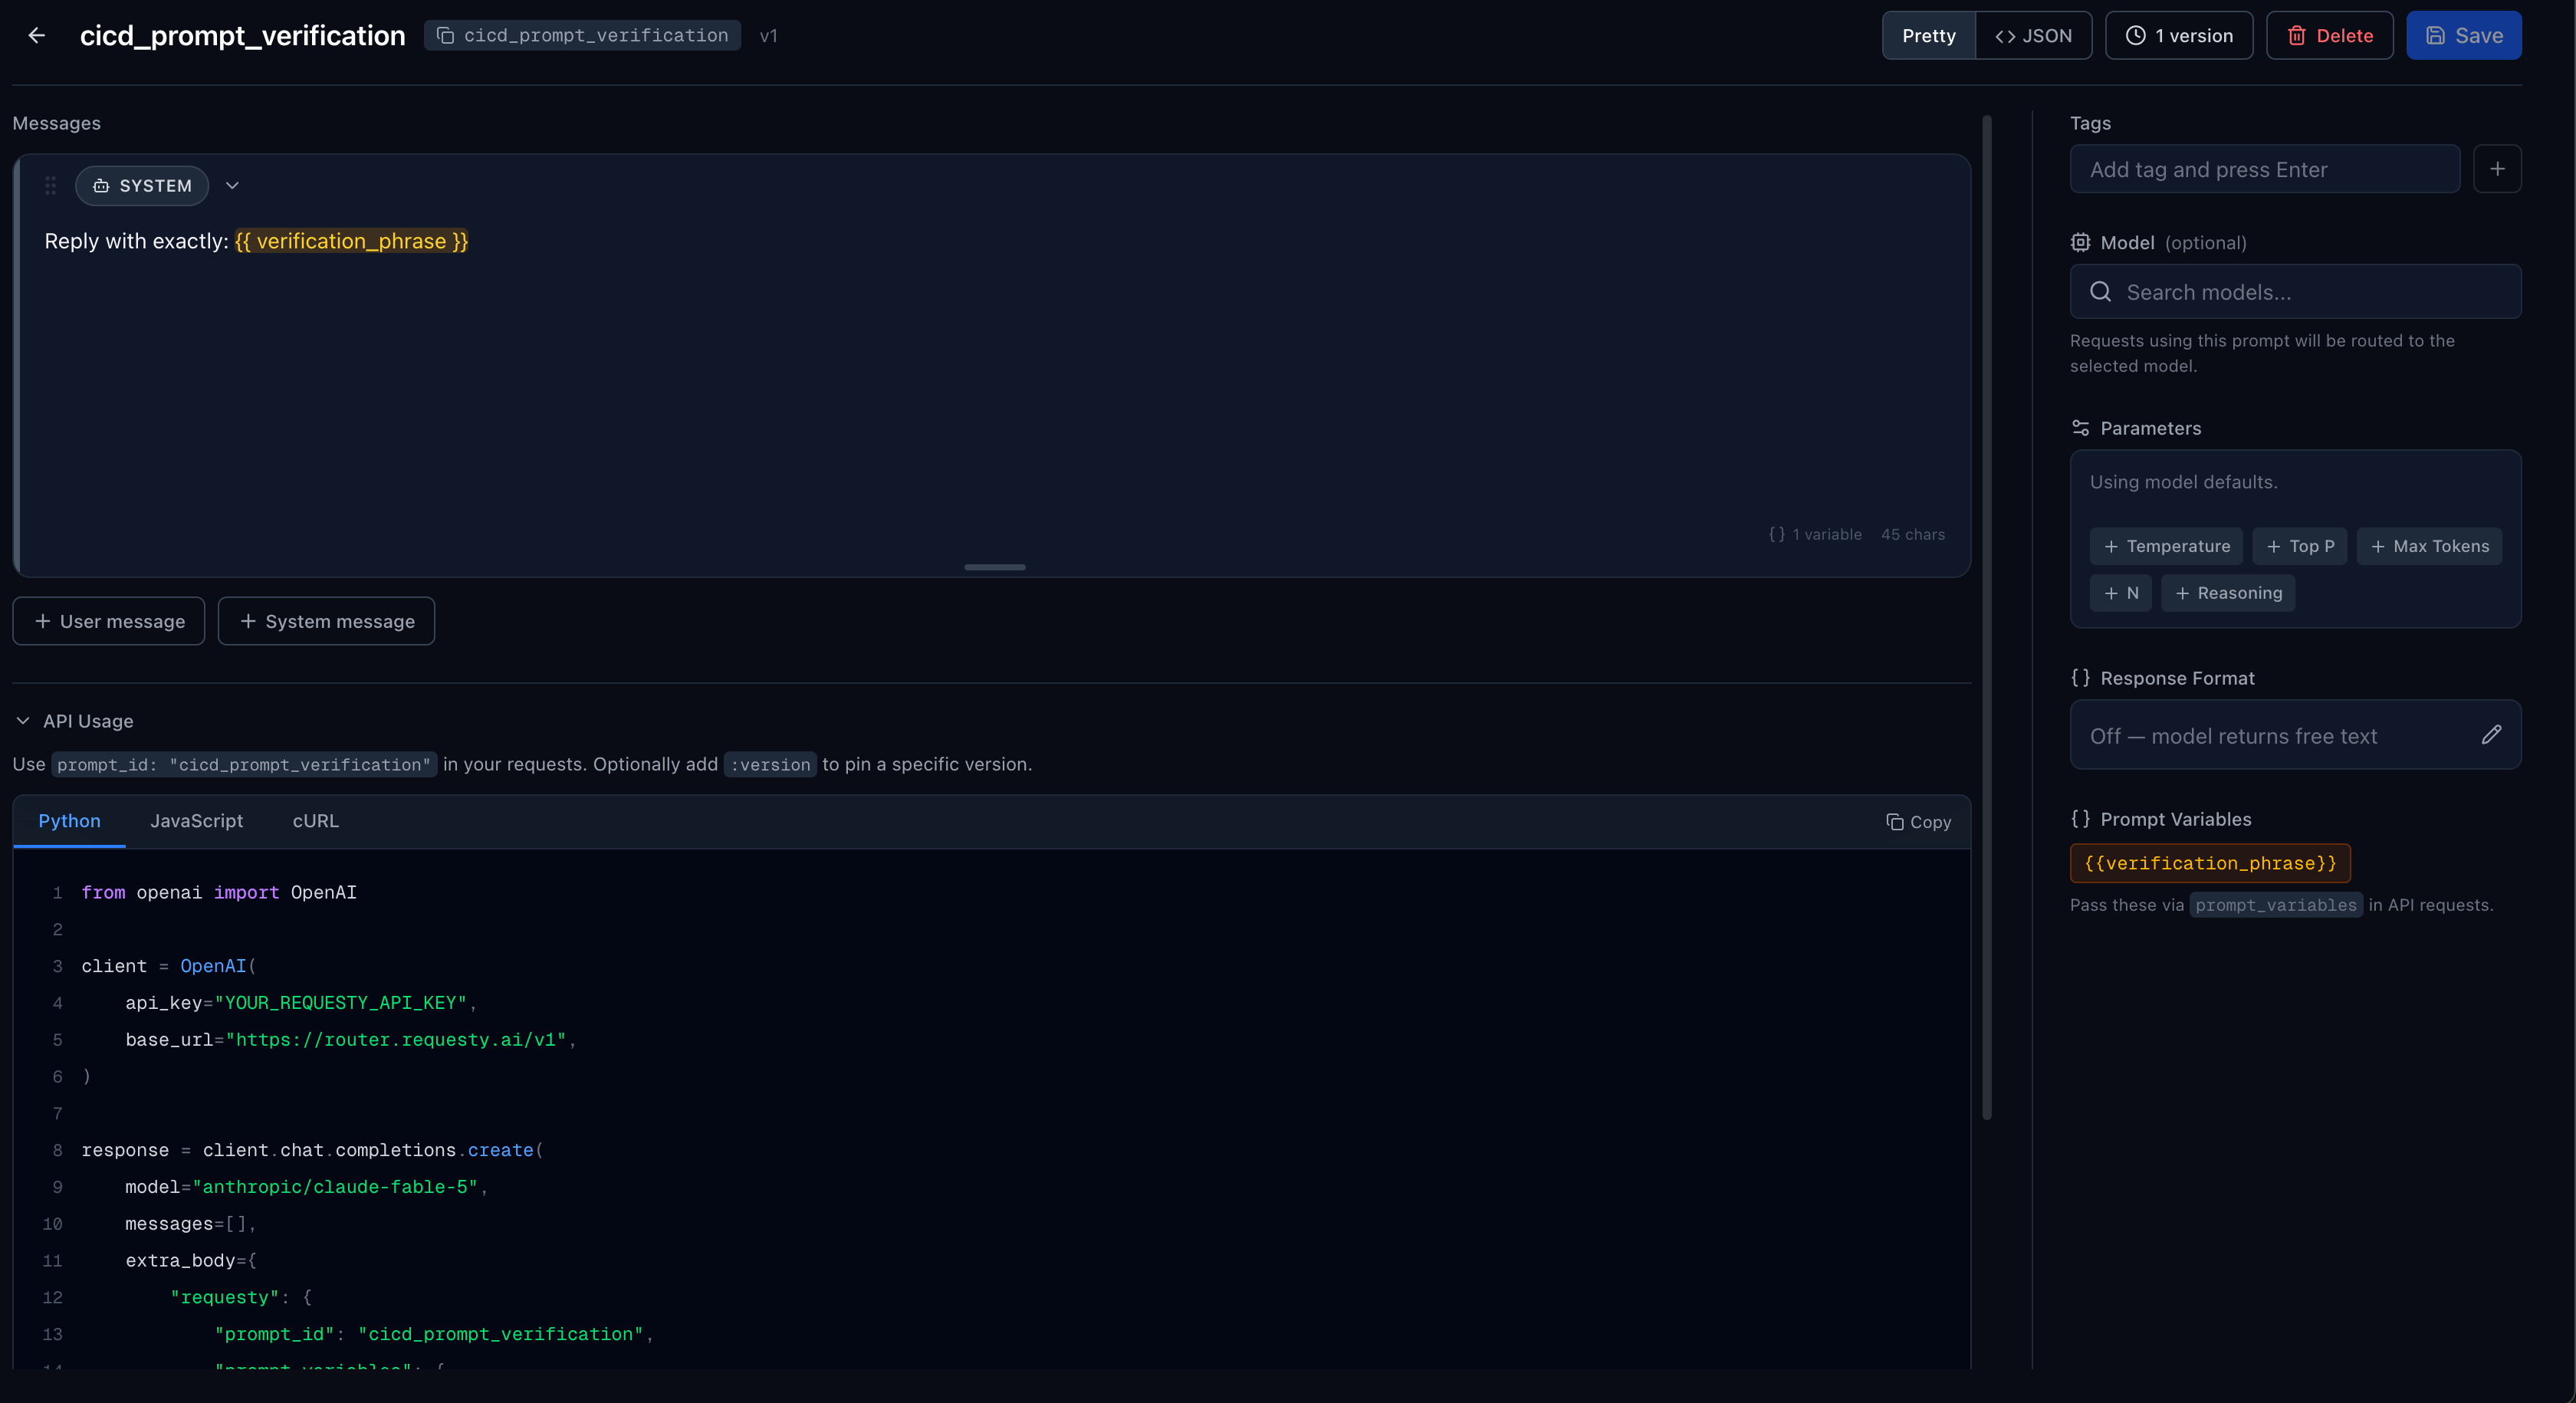
Messages
A prompt template is an ordered list of messages. Each message has a role (System or User) and text content.
- System messages steer the AI’s behavior. They define the persona, rules, and constraints.
- User messages provide context, examples, or few-shot patterns.
Model
Use the Model search box in the sidebar to attach a model to the prompt. Requests using this prompt are routed to the selected model, so callers no longer need to hardcode a model name in their code.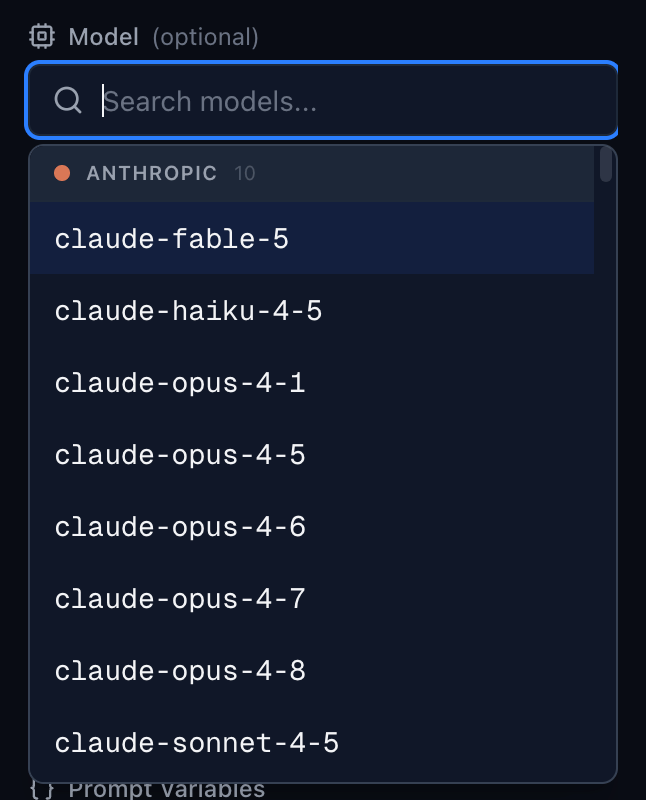
model field in your request; no provider or model name needed in your code. See Using the Prompt ID as the Model.
The model is versioned with the prompt: changing it creates a new version, and you can swap models (e.g. from claude-haiku-5-5 to claude-fable-5) without touching a single line of application code. The model is optional; prompts without one are used via prompt_id alongside a regular model in the request.
Model Parameters
Click the Parameters button next to “Messages” to configure model parameters that are applied automatically when the prompt is used. Active parameters are shown as summary badges (e.g.Temp 0.8, Reasoning high, Max 5000).
The following parameters are available:
Parameters are optional. Leave any parameter unset to use the model’s default. When a parameter is set on the prompt, it overrides the corresponding value in your API request.
Add a parameter by clicking its name in the “Add parameter” section of the popover. Remove it by clicking the X next to the active parameter. Each parameter includes a slider or number input for precise control.
Response Format
Click the edit icon next to Response Format to save the output format with the prompt. This is useful when a prompt always needs JSON or strict structured output.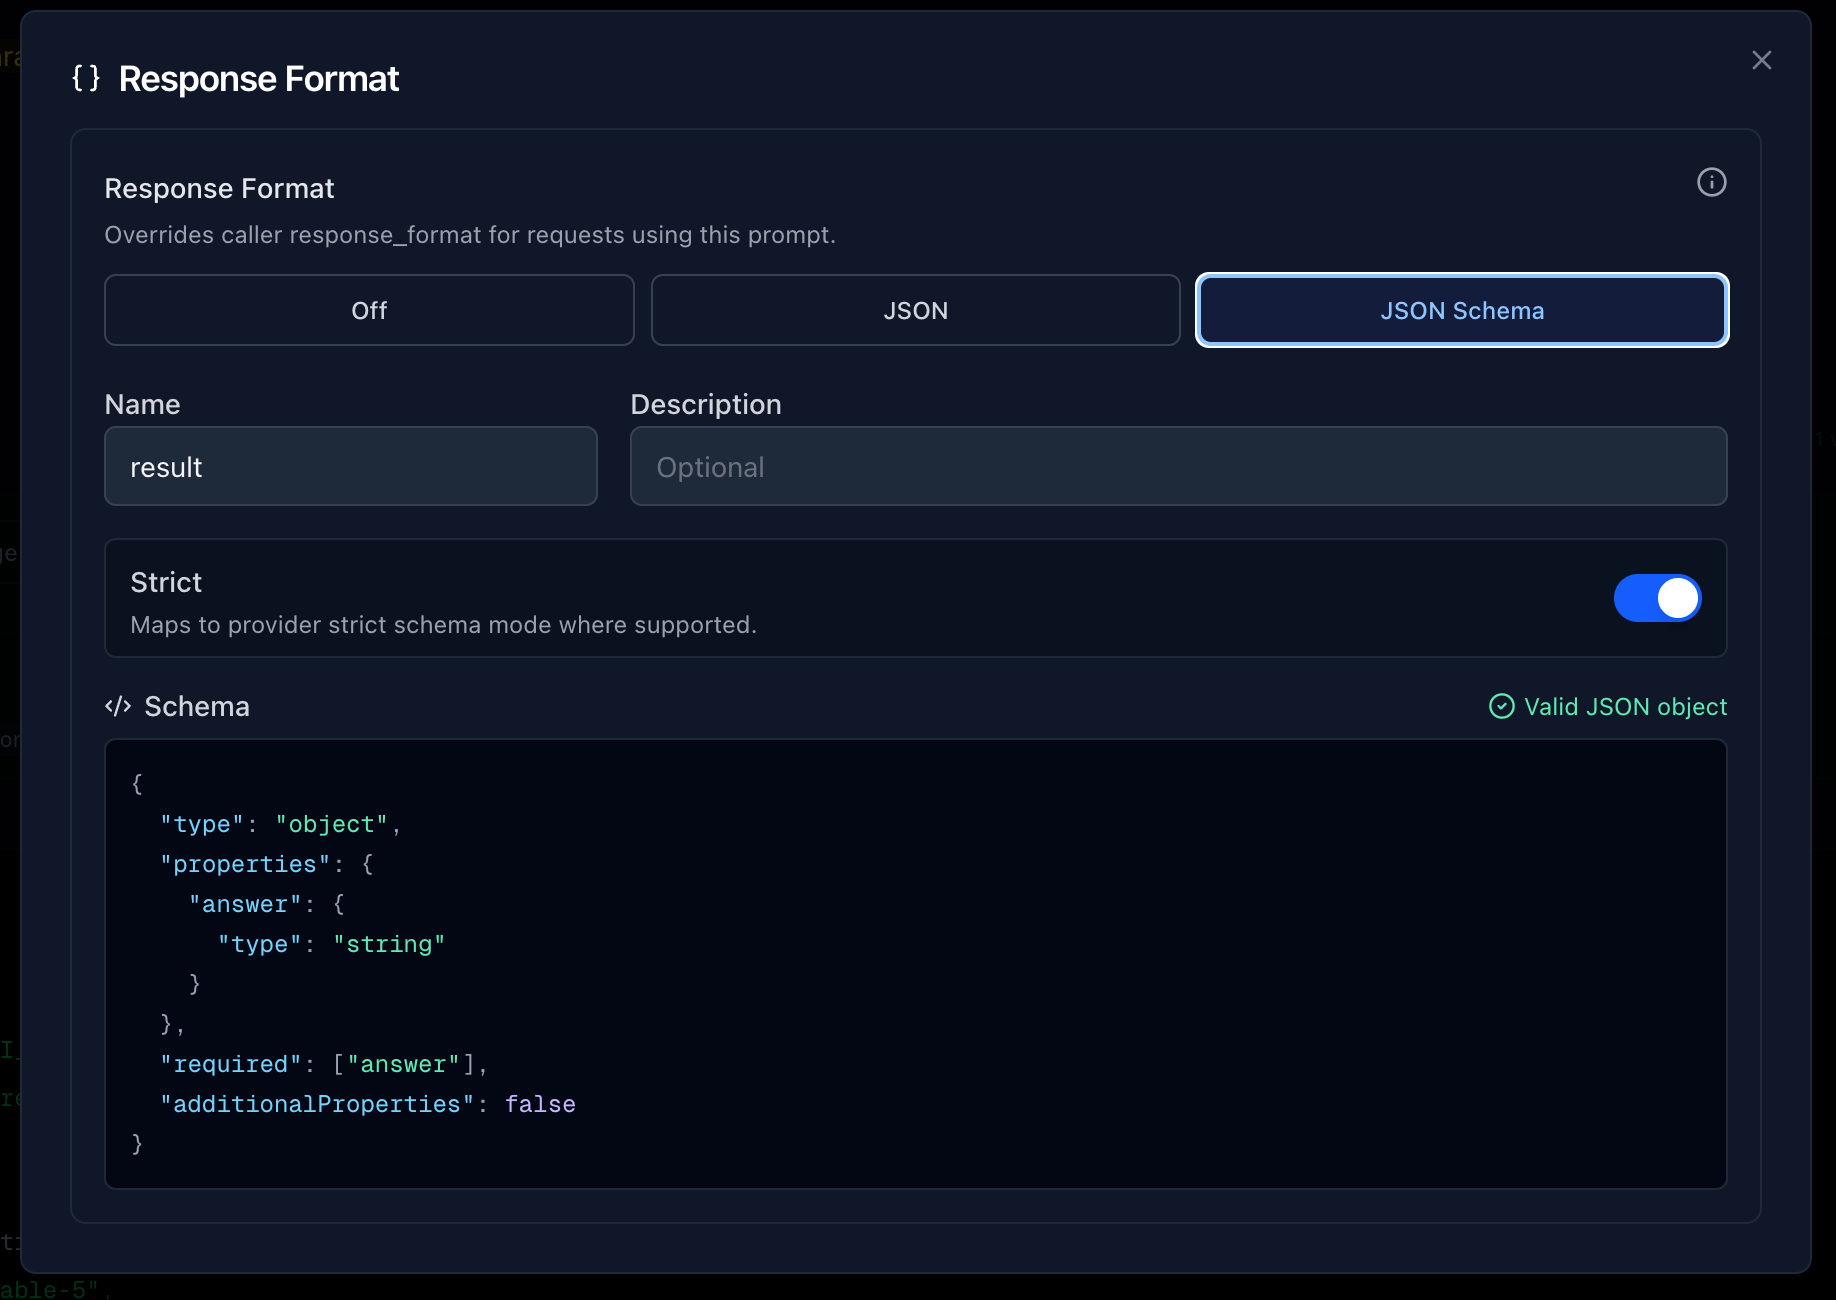
When JSON Schema is selected, configure:
Template Variables
Prompts support Jinja-style template variables using{{variable_name}} syntax in any message. Variables are automatically detected and displayed in the Prompt Variables section below the editor.
For example, a system message containing:
{{animal}} as a recognized variable. At request time, pass values via prompt_variables in the API call.
Tags
Add tags likeproduction, dev, staging, or any custom label to organize your prompts. Type a tag name and press Enter to add it. Tags appear in the prompts list for quick filtering.
Versioning
Every save creates a new version. The version history sidebar shows all versions with their creator, timestamp, and a link to compare any version with the one before it.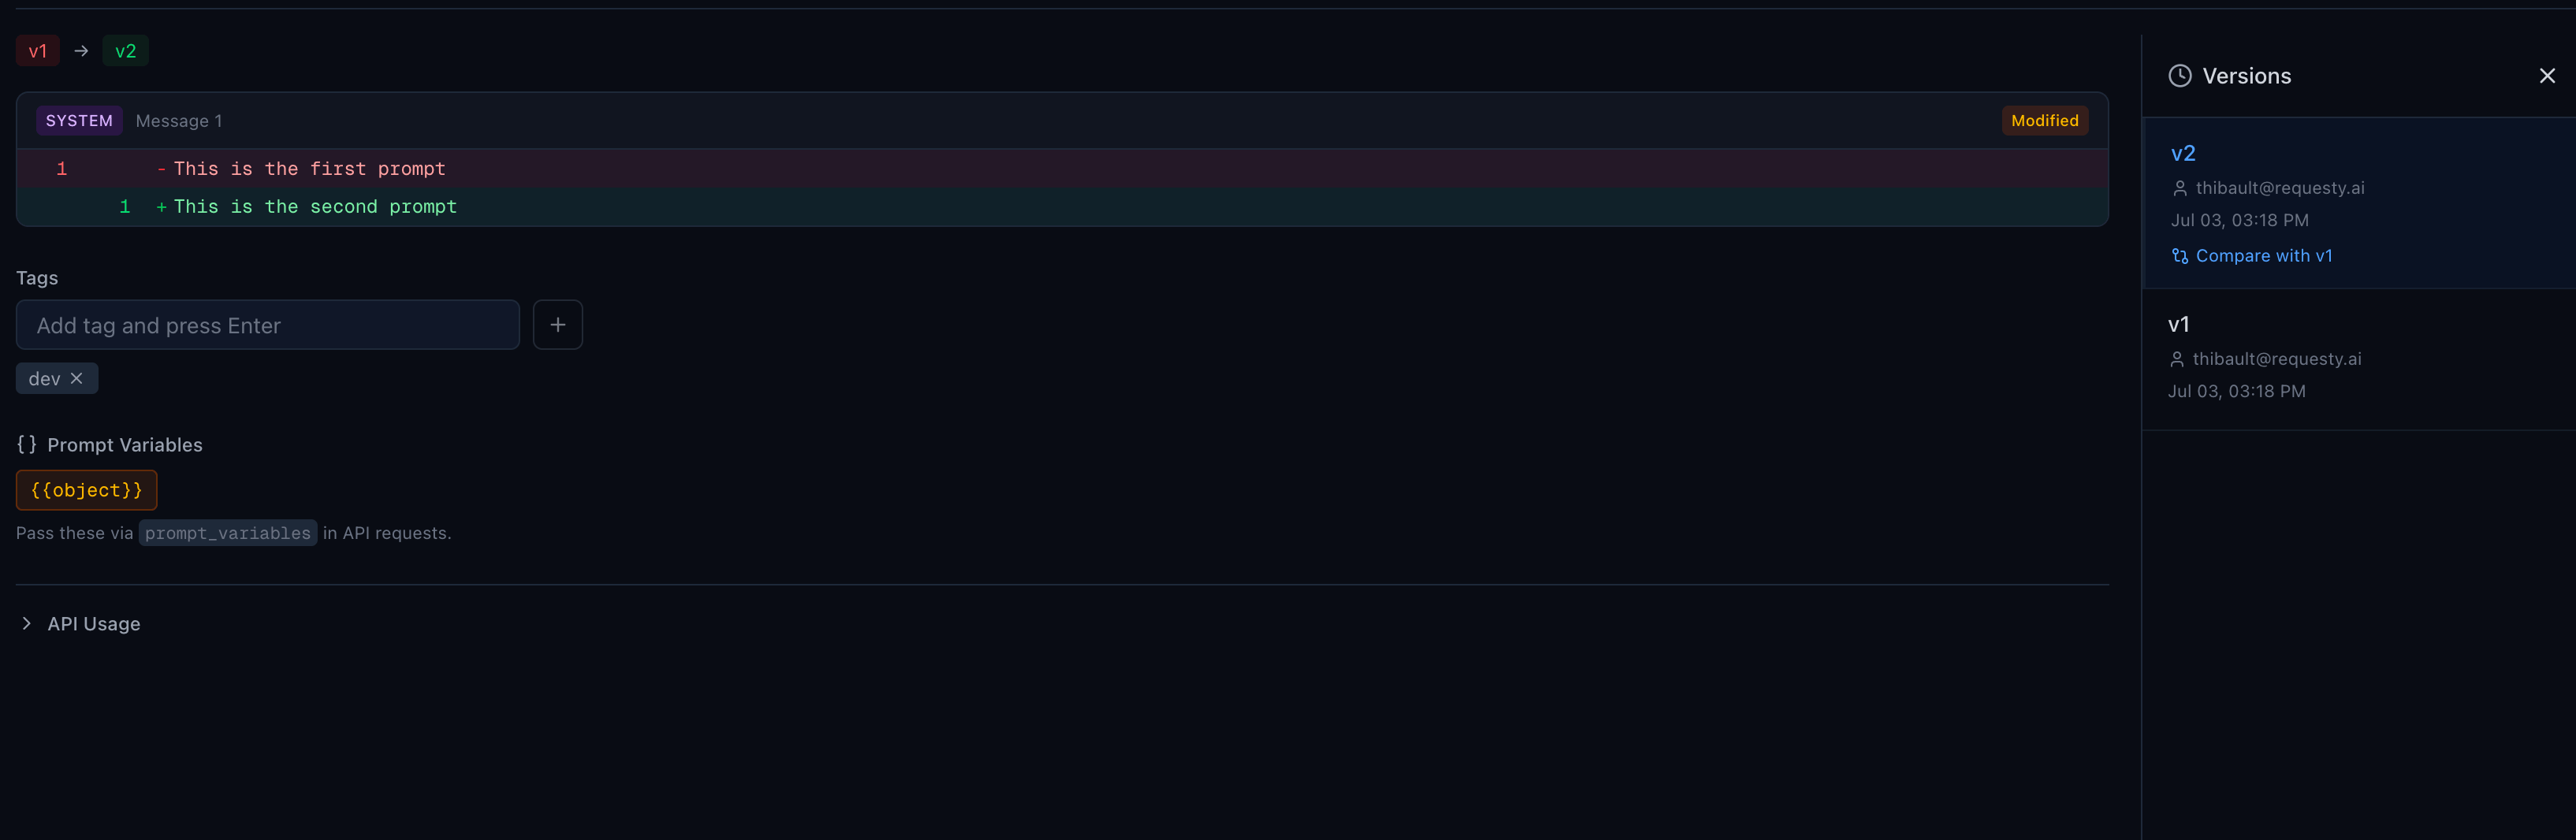
Version Sidebar
Click the N versions button in the top bar to open the version sidebar. Each entry shows:- Version number (e.g.
v2) - Creator email
- Timestamp
- A JSON or JSON Schema badge when the version has a response format
- Compare with vN link for the currently selected version
Diff View
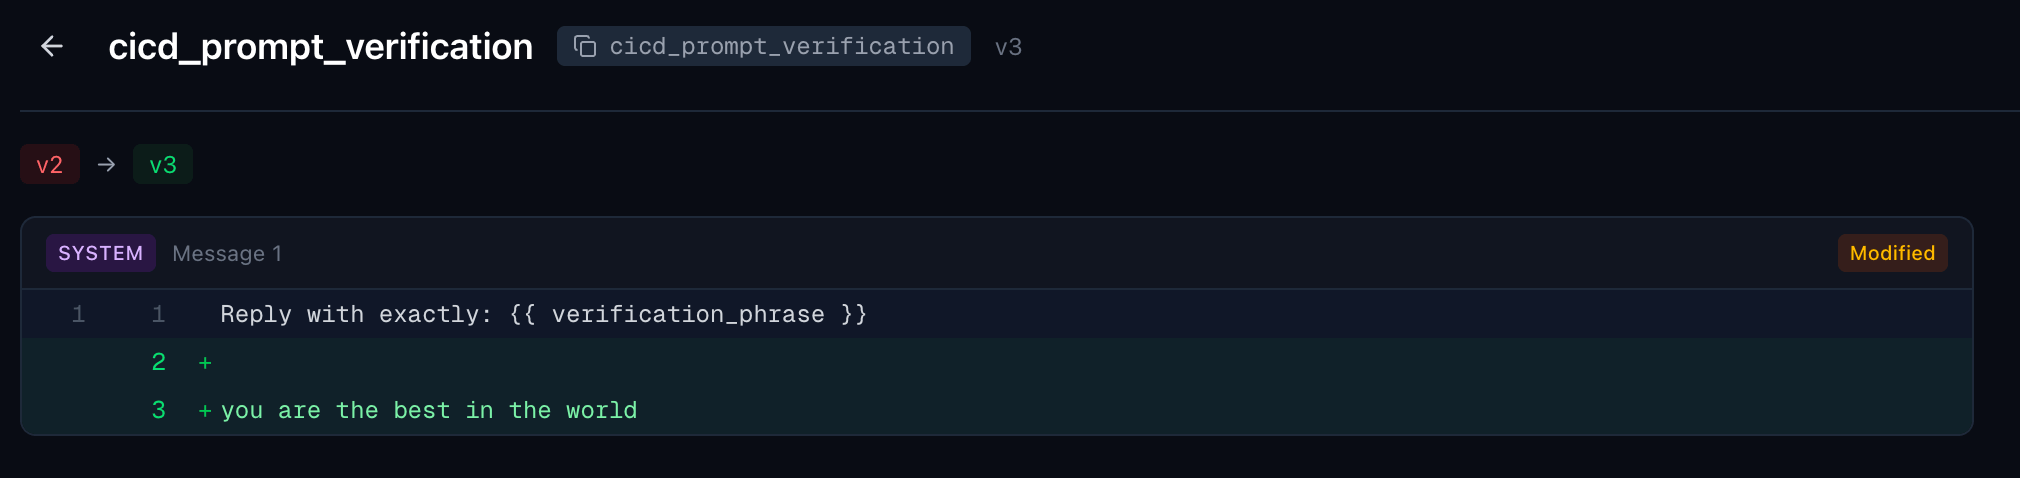
Click Diff in the top bar or Compare with vN in the version sidebar to see a line-by-line comparison between two versions. The diff viewer shows:- A version indicator (
v1 → v2) at the top - Each changed message with a Modified, Added, or Removed badge
- Line-by-line additions (green
+) and removals (red-) with line numbers - Role changes displayed inline if the message role was modified
JSON View
Click JSON to see the raw JSON representation of your prompt messages and settings. If model parameters or a response format are configured, they appear underparams; valid JSON Schema text is shown as a parsed object.
API Usage
Every prompt includes a ready-to-use API Usage section at the bottom of the editor. Expand it to see code examples in Python, JavaScript, and cURL.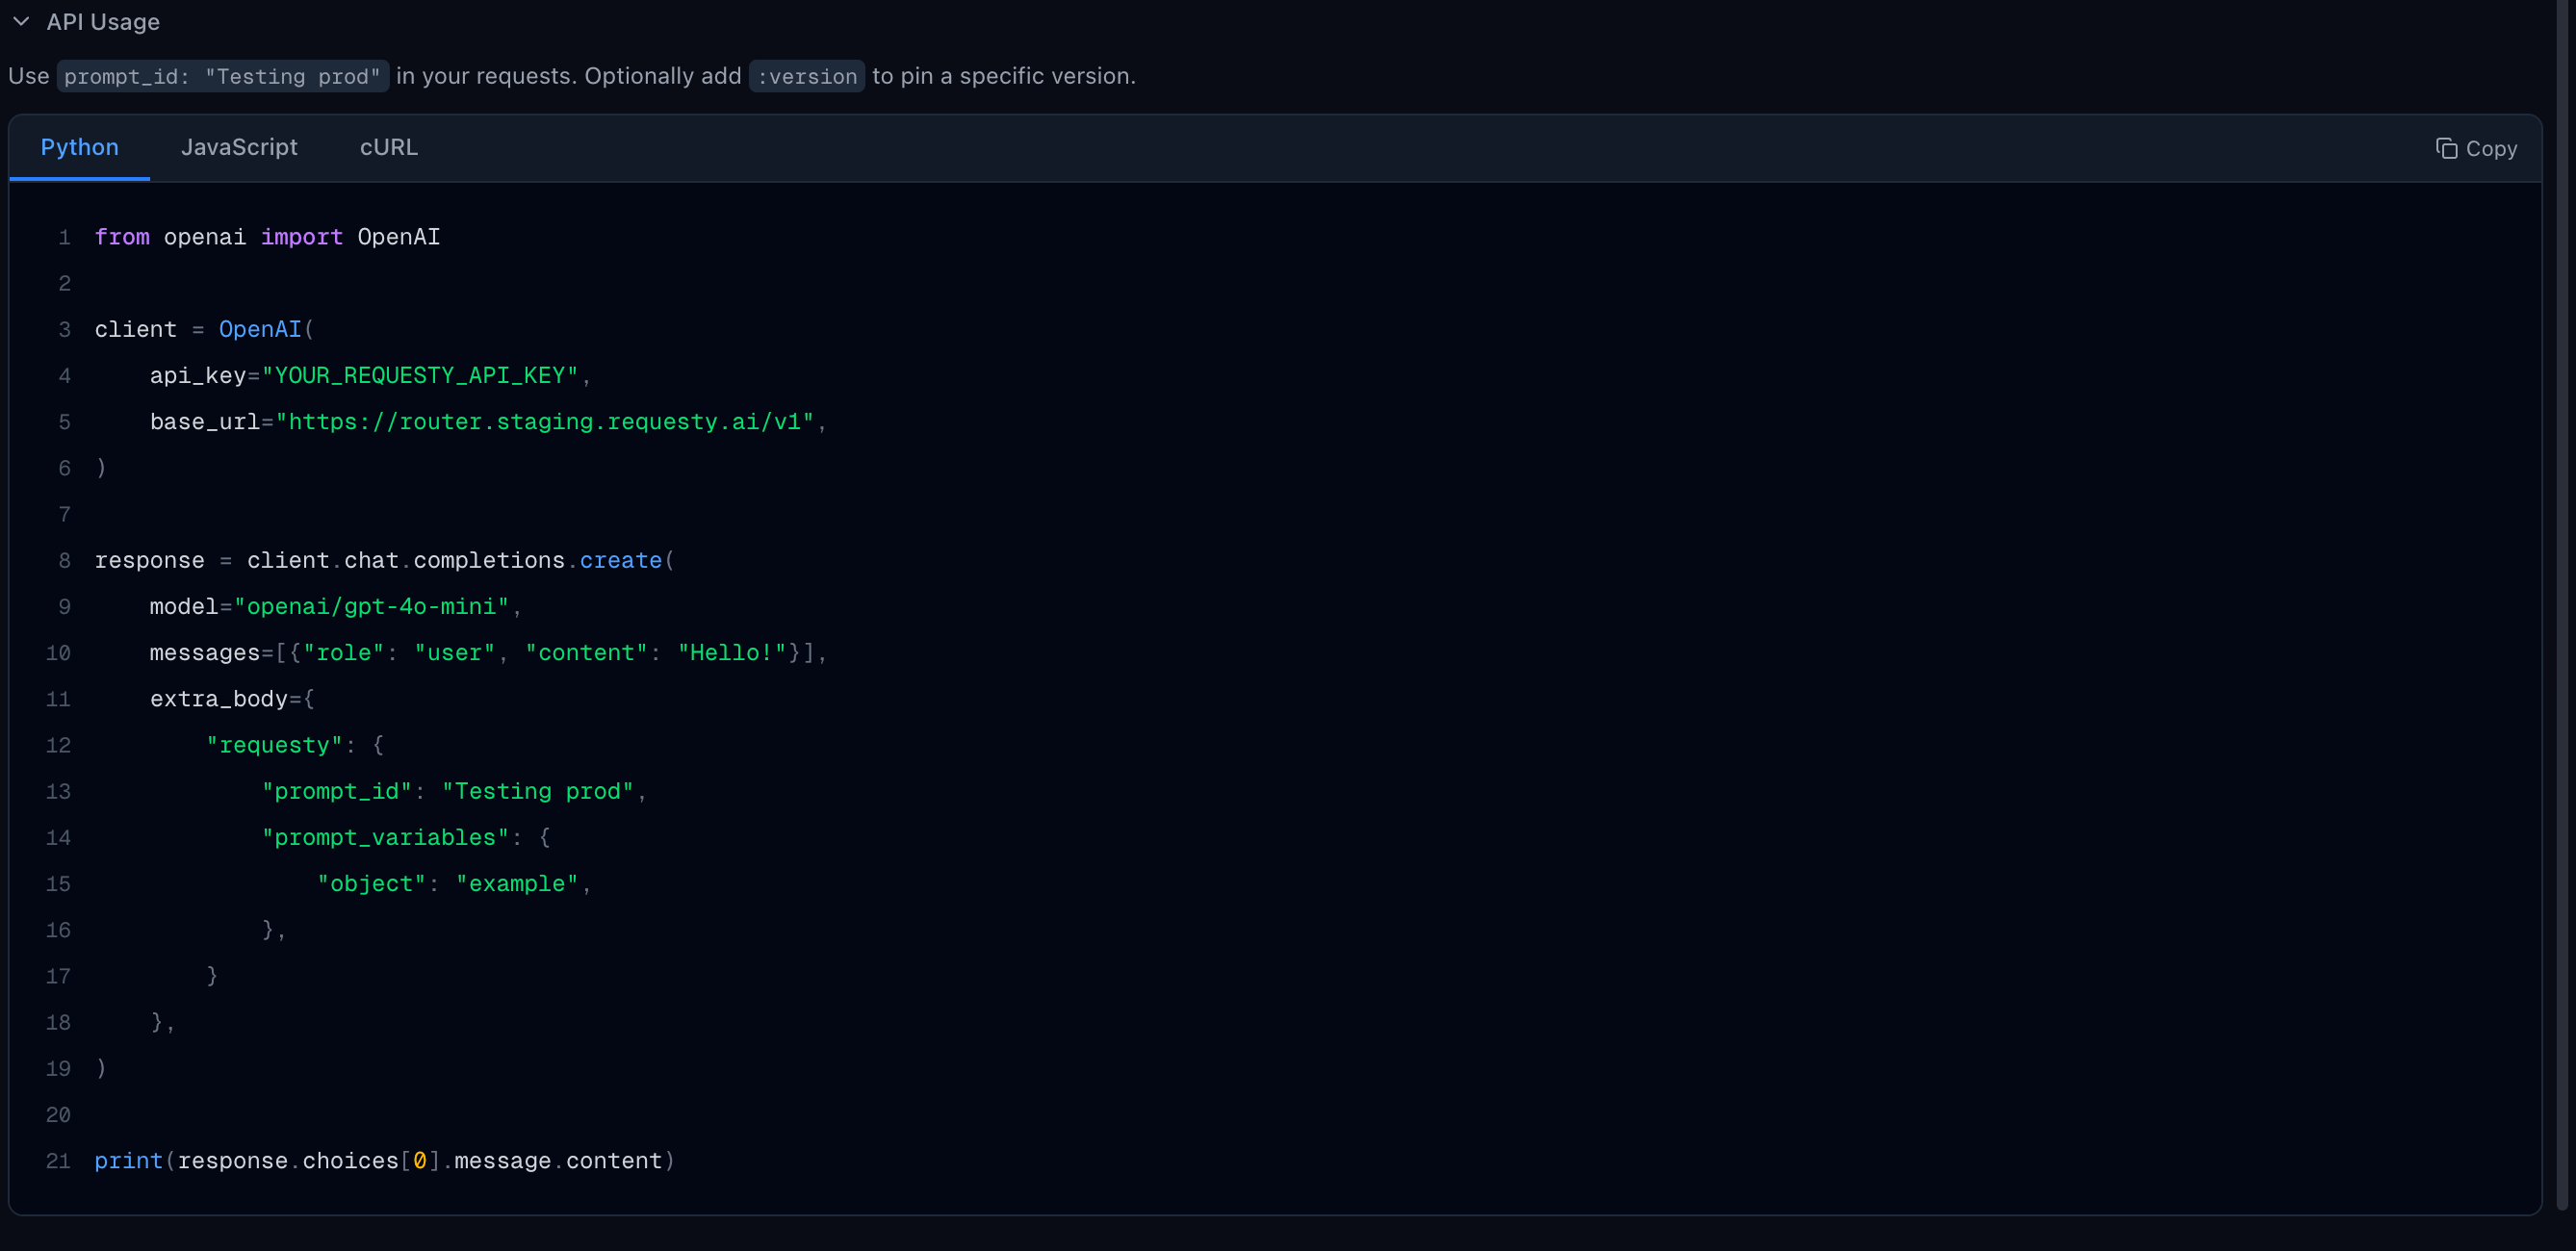
Using prompt_id in Requests
Instead of embedding long prompts in every API call, reference a prompt from your library by passing prompt_id (and optionally prompt_variables) inside the requesty extra body.
When a prompt_id is provided, the router:
- Fetches the prompt template from your library
- Renders each message with your
prompt_variables(if any) - Prepends the rendered messages to the
messagesarray in your request - Applies any model parameters and response format configured on the prompt
Python
If your prompt template already contains every message you need, pass an empty
messages array (messages=[]) so the request runs entirely from the template. The official OpenAI and Anthropic SDKs require the messages field to be present, so send [] rather than omitting it. Omitting the field entirely raises a client-side validation error.Using the Prompt ID as the Model
When a prompt has a model attached, the prompt ID doubles as a model name. Pass it directly in themodel field and the router resolves the prompt, injects its messages, applies its parameters and response format, and routes to the attached model:
Python
- The prompt must have a model attached. Using a prompt ID as the
modelwithout one returns an error. - The
modelfield always resolves to the latest version of the prompt. To pin a version, useprompt_idwith a version suffix instead. - Don’t combine both: sending the prompt ID as the
modeland passingrequesty.prompt_idin the same request returns the errorYou cannot specify prompt via requesty.prompt_id and model at the same time.
Version Pinning
"prompt_name"uses the latest version"prompt_name:version"pins a specific version (e.g."my-prompt:3")
prompt_id. When the prompt ID is used as the model, the latest version is always applied.
Request Parameters
*Required unless the prompt ID is passed as the
model field.
Code Examples
Template-Only Requests
When the prompt template supplies all of the messages, pass an emptymessages array so the request runs entirely from the template. Combine this with prompt_variables to fill in any {{variable}} placeholders.
How Prompt Settings Are Applied
When a prompt with configured settings is used in a request, the router applies them in this order:- Your API request is parsed with its original parameters (temperature, max_tokens, etc.)
- The prompt template messages are fetched, rendered with variables, and prepended to your messages
- Any model parameters or response format set on the prompt override the corresponding values in your request
- If the prompt ID was used as the
model, the request is routed to the prompt’s attached model
temperature: 0.8, reasoning_effort: high, and a json_schema response format on a prompt, and every request using that prompt will inherit those settings without any client-side changes. Settings not set on the prompt are left unchanged from your request.
Prompt Lifecycle
Creating a Prompt
- Click + Create from the prompts list
- Enter a name (this becomes the
prompt_idused in API requests) - Add one or more messages with system or user roles
- Optionally attach a model and configure model parameters or a response format
- Add tags for organization
- Click Create to save
Updating a Prompt
- Open an existing prompt from the list
- Edit messages, the model, parameters, response format, or tags
- Click Save to create a new version
- The previous version remains accessible in the version history
Deleting a Prompt
Click Delete to remove a prompt and all its versions. This action cannot be undone. Any API requests referencing the deletedprompt_id will return an error.
Quick Start
- Create a prompt in the Prompt Library
- Add messages with your instructions, optionally using
{{variable}}placeholders - Attach a model and configure parameters or a response format if needed
- Note the prompt name (shown as the copyable Prompt ID)
- Pass
prompt_idin your API requests via therequestyextra body, or use the prompt ID as themodelif it has a model attached - Check your logs to see the rendered prompt in action