Set up access lists in the Requesty Console.
- Per team policies. Attach a list to a group so every member inherits the same model allowlist.
- Per workload policies. Attach a stricter list to a single production API key while leaving exploratory keys open.
- Compliance. Restrict keys or groups to models that meet your data residency or vendor requirements.
- Cost control. Block expensive frontier models from low priority workloads.
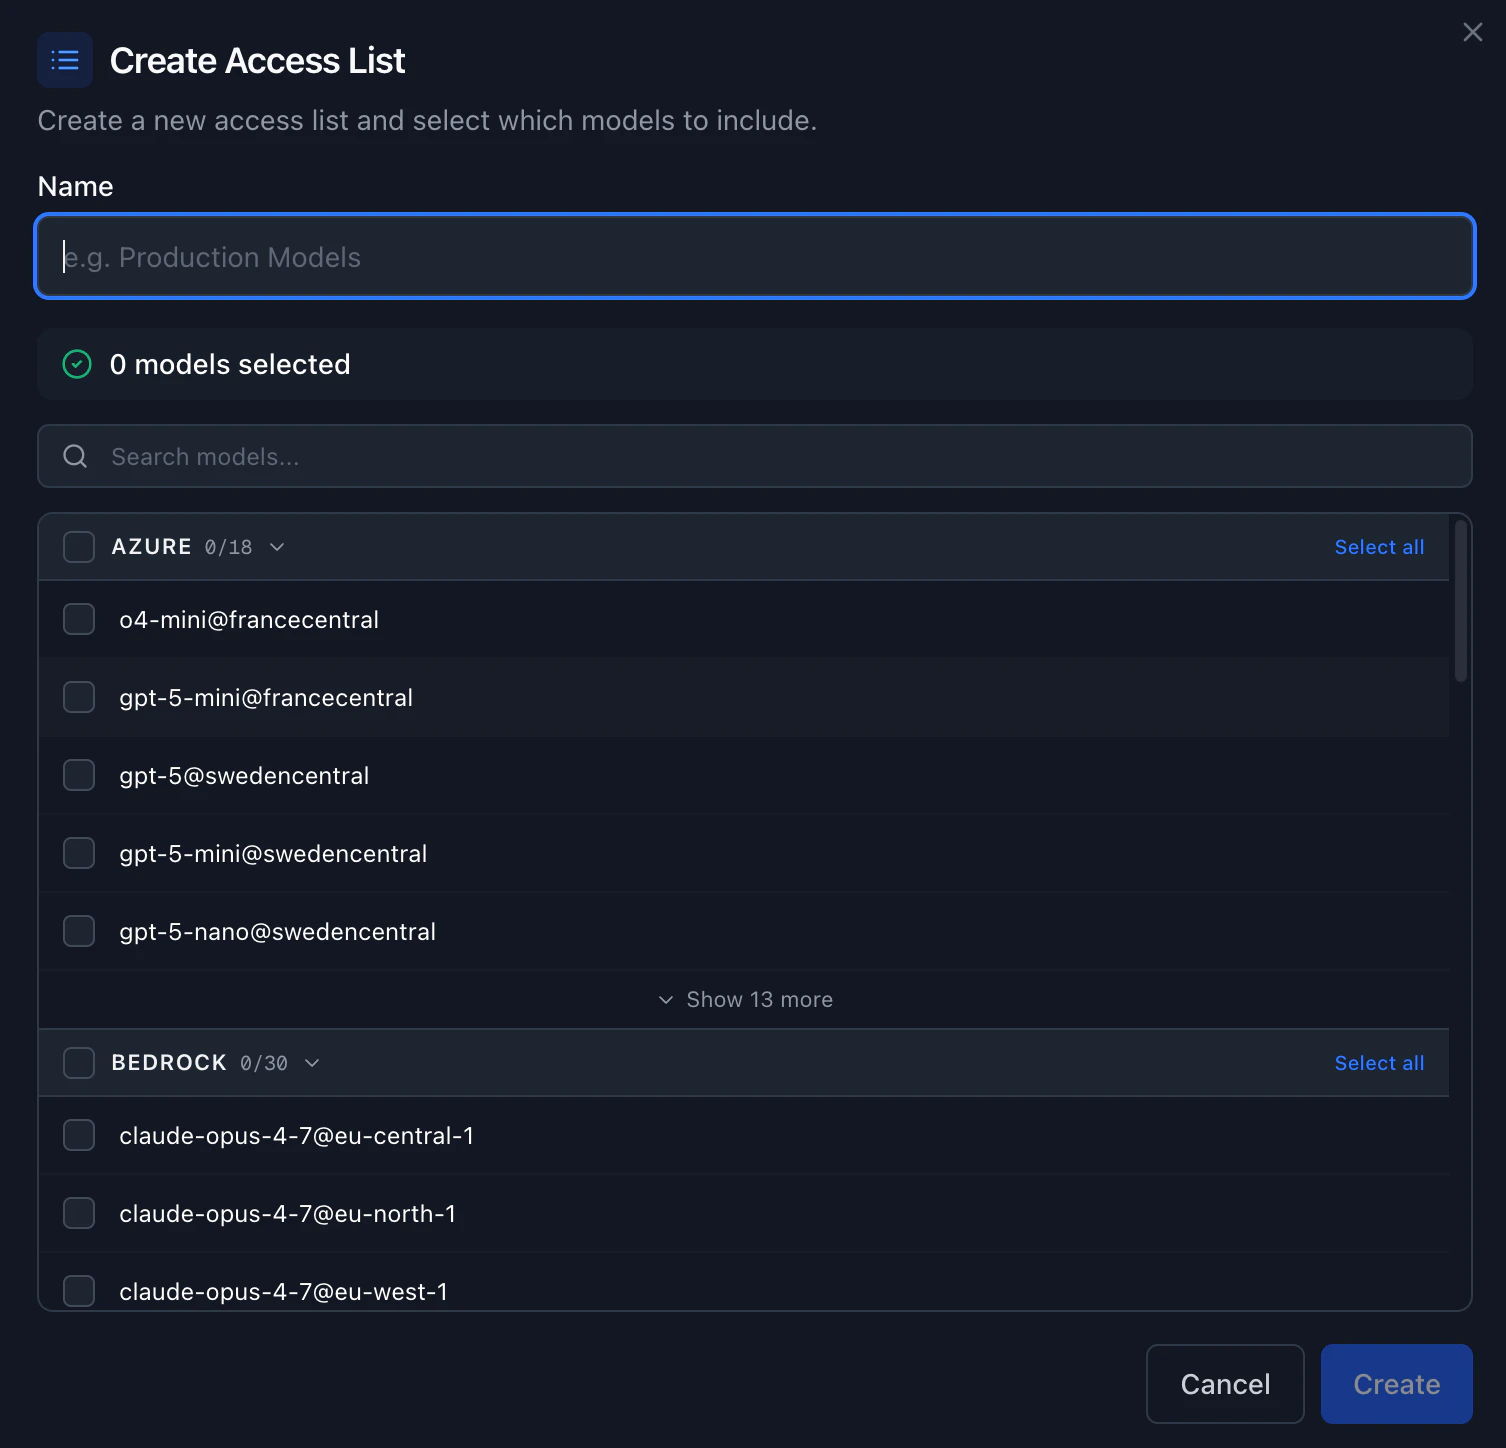
Create an access list
Everything for access lists lives in Admin Panel > Access Lists. Each list card shows how many groups and API keys it is currently attached to, plus a preview of the models it contains.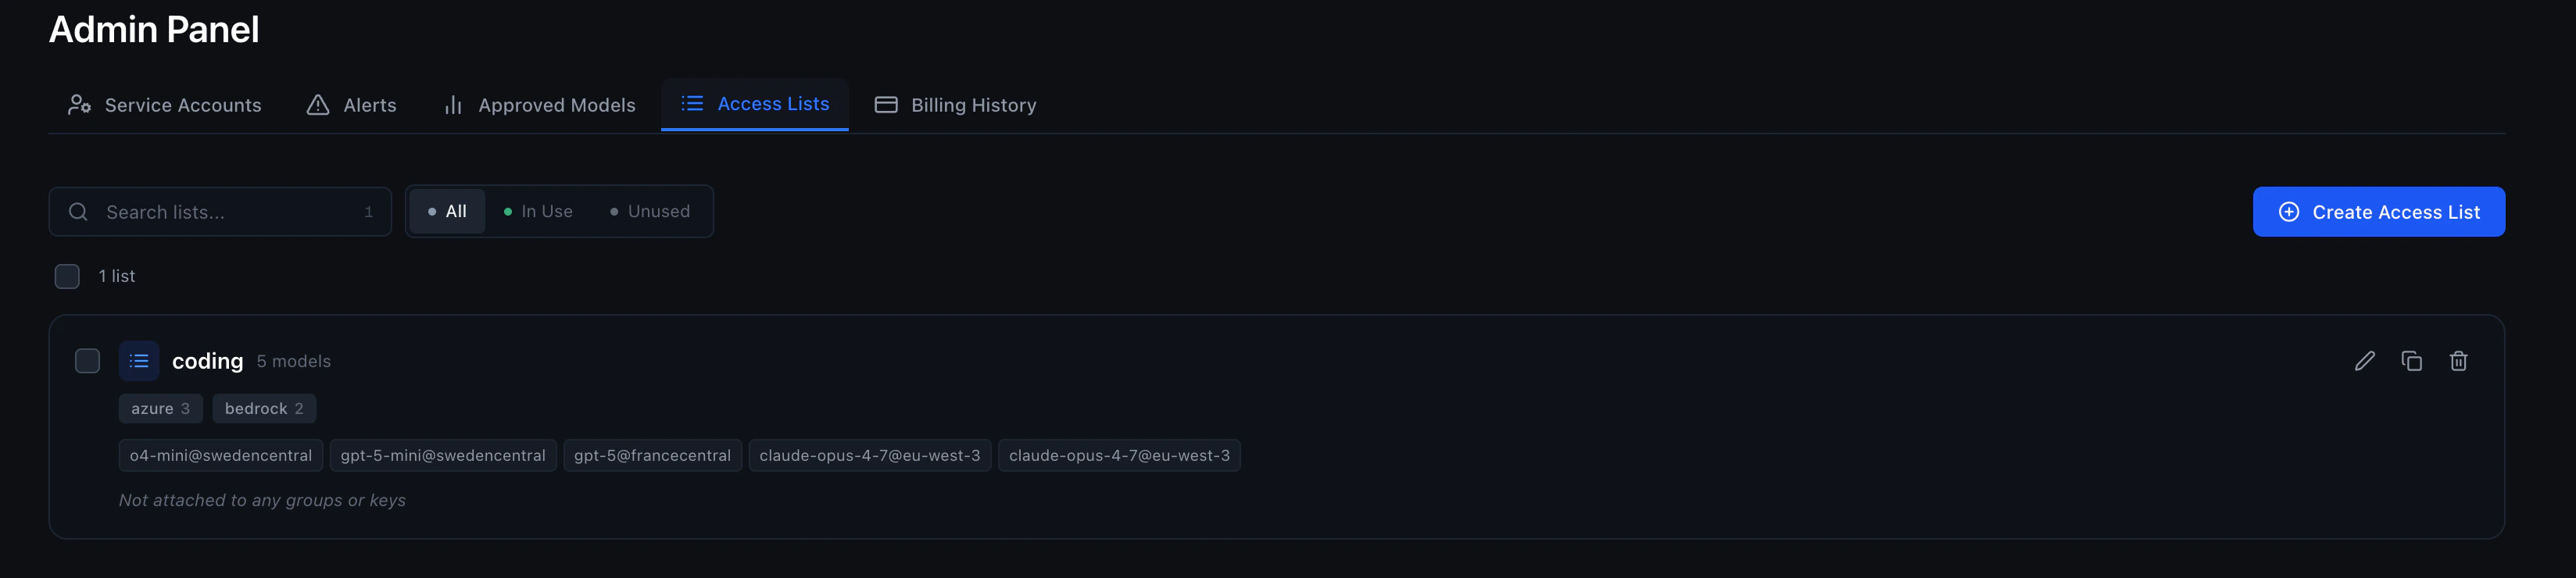
An access list lives at the organization scope. The same list can be attached to many groups and many API keys at once. Updating the list updates the policy for every attached resource.
Edit, duplicate, or delete a list
From the card on the Access Lists page:- Edit the name and the set of models. Changes take effect immediately for every group and API key that has this list attached.
- Duplicate the list to use it as a starting point for a new policy.
- Delete the list. Any group or API key that had this list attached falls back to the next layer (group list, then group default access list, then organization approved models).
Restricted access lists
When you create or edit an access list, you can mark it as Restricted. Restricted access lists can only be attached to groups and API keys by organization admins. Group admins and regular members cannot attach a restricted list. Non-restricted access lists can be attached by group admins as well as organization admins. Use restricted lists when you need tight admin control over a policy — for example, a production access list that only the platform team should be able to assign. Non-restricted lists are useful for policies that group admins should be able to self-serve, such as letting team leads pick the right model set for their group.Group default access list
You can set a group default access list at the organization level. This access list is automatically applied to any group that does not have its own access list explicitly attached. Set or clear the default in Admin Panel > Access Lists or via the Management API. When a default is set:- Groups with an explicit access list continue using their own list.
- Groups without an access list fall back to the group default access list instead of falling through to the organization Approved Models.
- If the default is cleared, groups without an explicit list fall back to Approved Models as before.
Attach an access list to a group
When an access list is attached to a group, every API key that belongs to that group inherits the list (unless that API key has its own access list, which overrides the group). In Admin Panel > Groups, expand the group you want to restrict. Each group has an Access List section. Click Manage, pick one of your access lists from the dropdown (or None to clear it), and save. The change applies on the next request through any API key in this group.Attach an access list to an API key
You can attach an access list when you create a new API key, or attach (or change) one later on an existing key. A list attached directly to a key overrides any group list, so use this when you want a single workload (for example, a production agent) to be more restricted than the rest of the group. When creating a key. Go to API Keys, click Create API Key, and pick a list in the Access List field. Leave it as No access list (no model restrictions) if you do not want to restrict the key. On existing keys. In the API Keys page, select one or more rows. The bulk action bar at the bottom of the page lets you pick an access list from the dropdown and click Attach. Attaching the same list to many keys at once is the fastest way to roll out a new policy.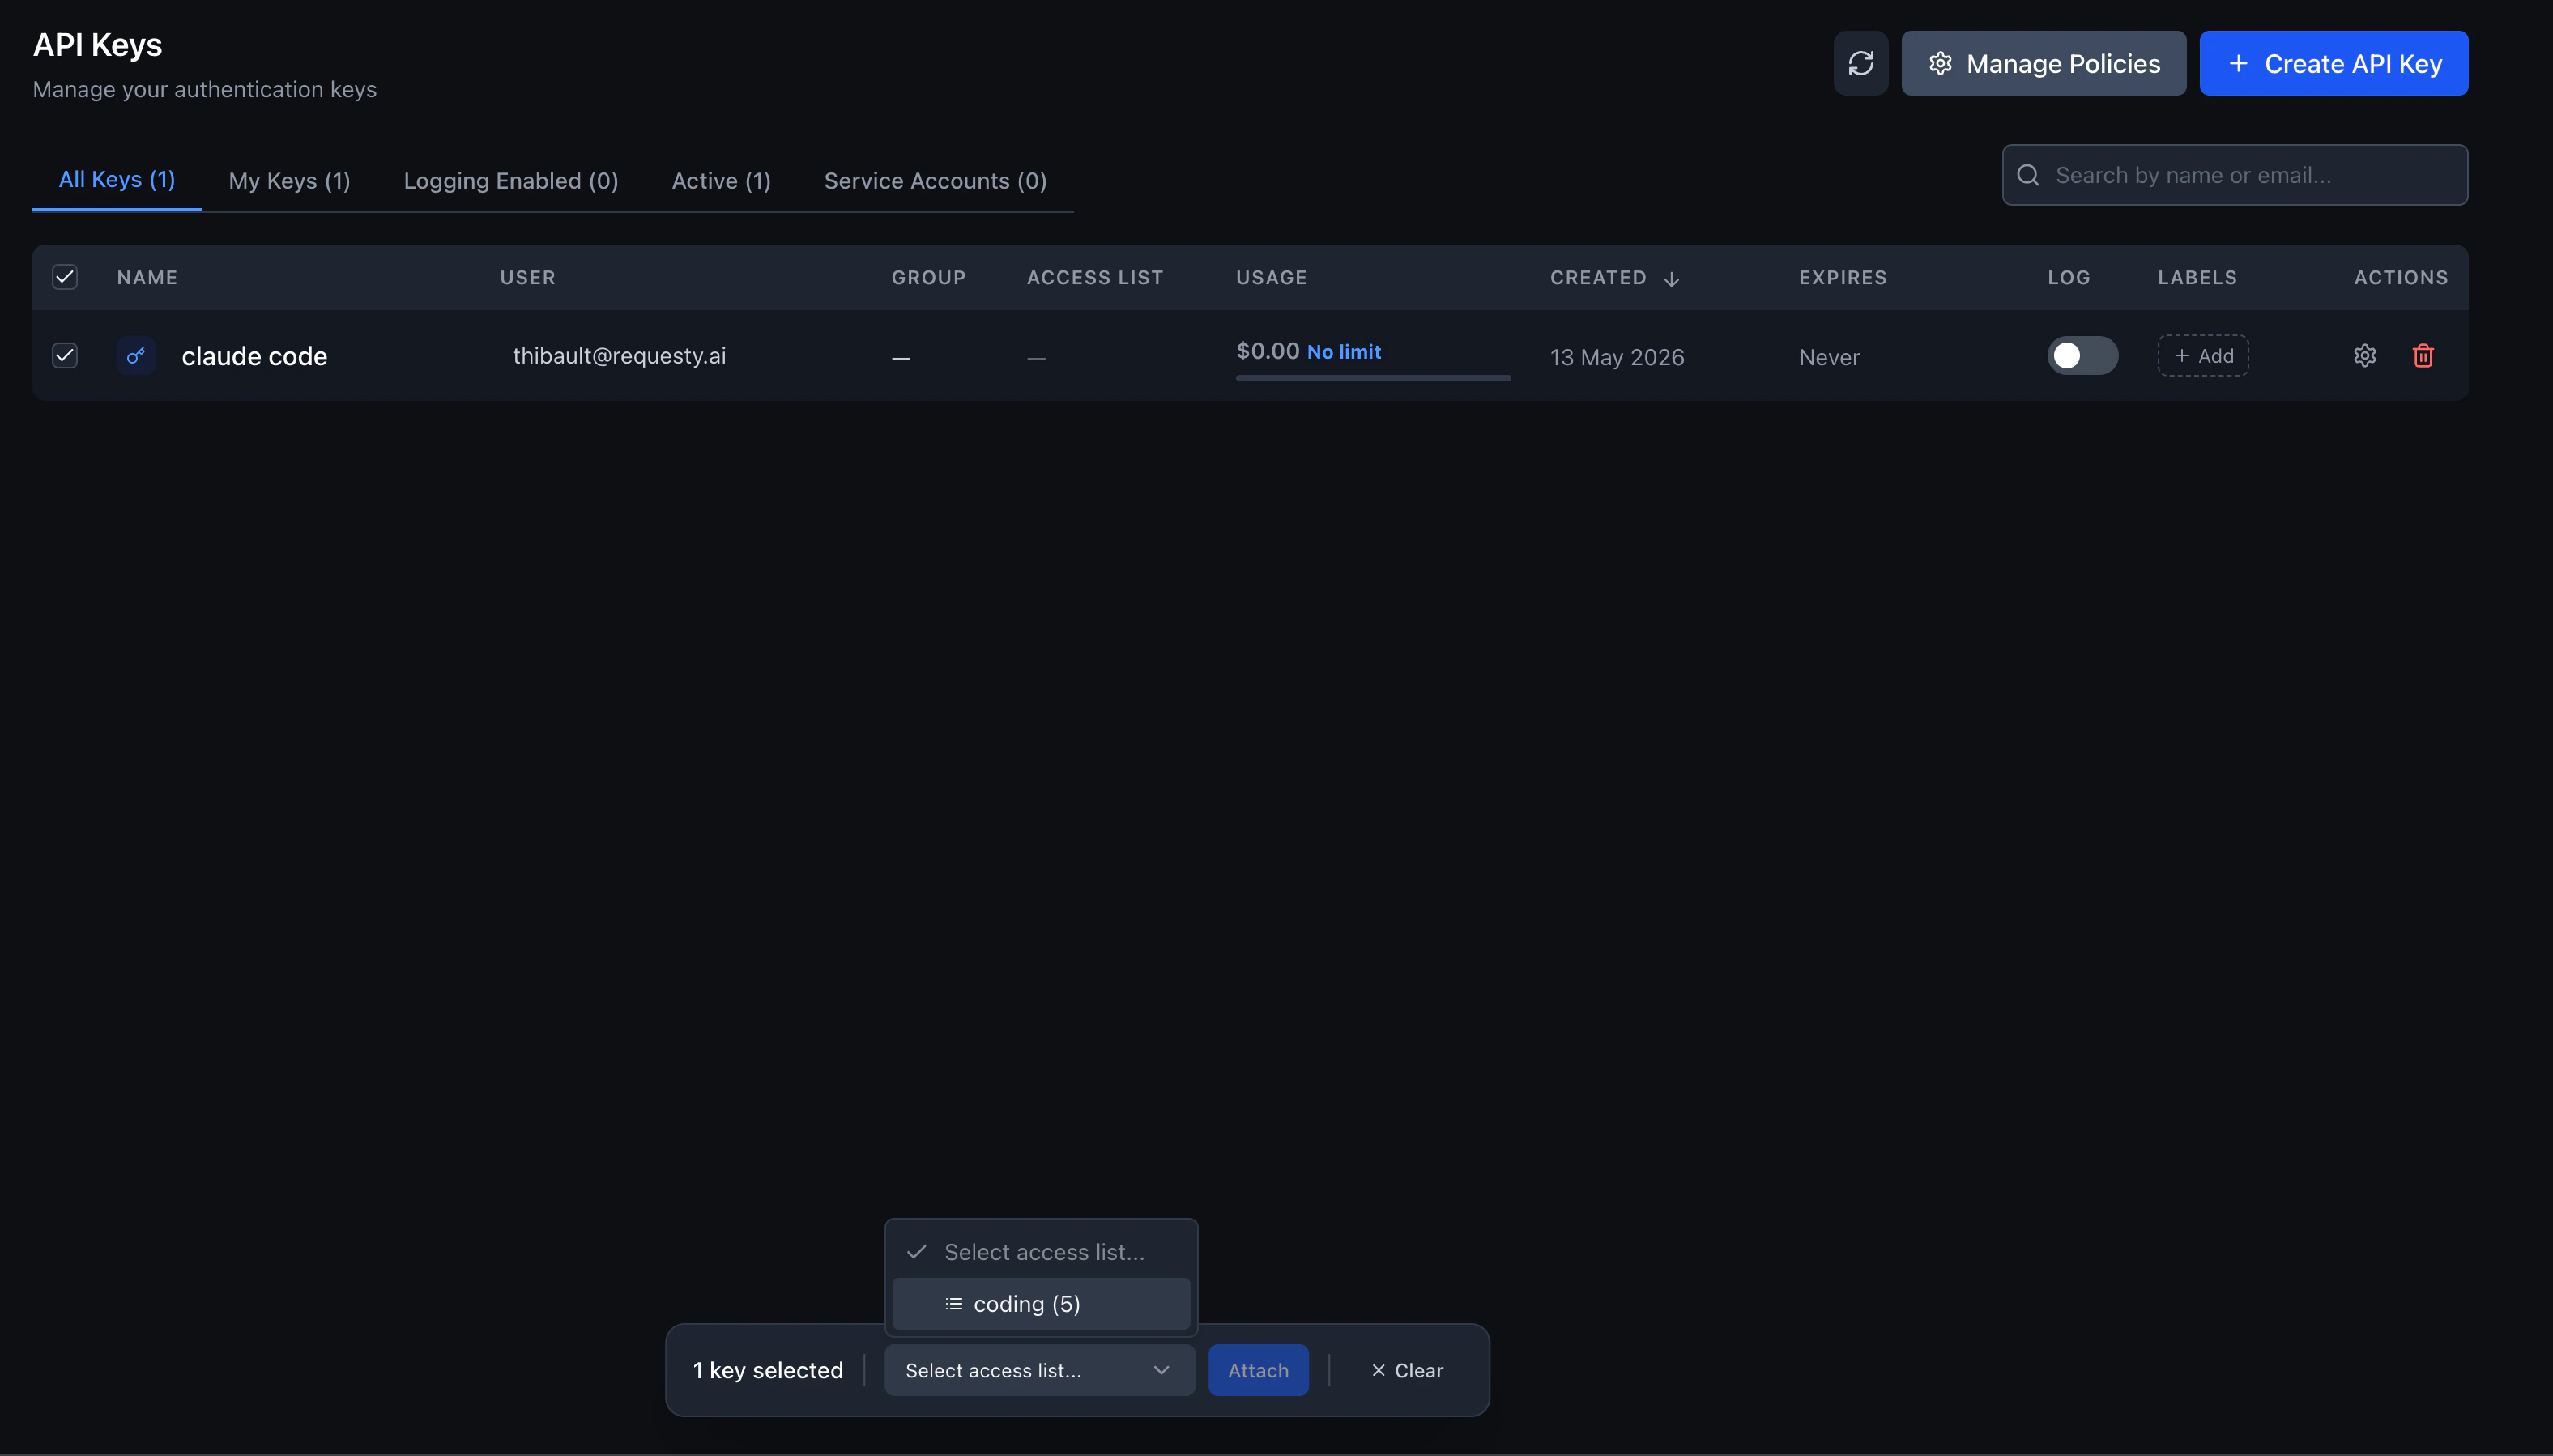
Detaching an access list from an API key does not open the key up to every model. It falls back to the group list, then the group default access list, and then the organization Approved Models, in that order.
Enterprise: access lists with groups
This section applies to Enterprise organizations that have groups enabled. If your organization does not use groups, access lists still work. They attach directly to API keys without a group selection step.
| Scenario | Who creates key | Access list dropdown | Effective models on key |
|---|---|---|---|
| User in 1 group, group has access list | User | Only that group’s non-restricted lists (auto-selected, no choice) | Group’s access list enforced |
| User in 1 group, group has no access list | User | No dropdown (hidden) | Group default access list, then org Approved Models fallback |
| User in 2+ groups, all have access lists | User | Only their groups’ non-restricted lists (choose one) | Whichever group list they pick |
| User in 2+ groups, some have access lists | User | Only non-restricted lists from groups that have one | Whichever group list they pick, or no list |
| User in no group | User | No dropdown (hidden) | Group default access list, then org Approved Models fallback |
| Admin | Admin | All org access lists, including restricted (unchanged) | Whatever list they pick |
How it works
- User creates an API key. The dialog asks them to pick a group first (required in enterprise mode).
- Requesty fetches available access lists. The backend returns only the non-restricted access lists attached to the selected group. Admins see all lists, including restricted ones. If the group has no access list, the dropdown is hidden entirely.
- User picks an access list (if any are available). The selected list is attached directly to the new API key.
- Models are enforced at request time. The resolution order applies: the API key’s access list wins, then the group’s list, then the group default access list, then the organization Approved Models.
Assigning access lists to groups
Admins attach access lists to groups in Admin Panel > Groups. A single group can have multiple access lists attached, giving members a choice when they create keys. See Attach an access list to a group above for the step-by-step.If a user belongs to multiple groups and each group has different access lists, the user sees the combined set of lists from all their groups. They pick one list per API key.
How tools see your access list
GET /v1/models returns only the models the calling API key is allowed to use. When you attach an access list to a key, any tool that fetches the model list will automatically show only the allowed models. This includes Open WebUI, Claude Code, GitHub Copilot, Cursor, and any other client that calls the models endpoint.
For example, if you create an access list with just two models and attach it to a key, pasting that key into Open WebUI will show exactly those two models in the model picker.
All modalities are enforced
Access lists cover every model modality: chat completions, embeddings, image generation, audio (speech and transcription), and any future modality added to the Requesty catalog. When an access list is resolved for a request, only the models explicitly included in that list are allowed, regardless of modality. This means:- If you add only chat models to an access list, the key or group cannot use embedding, image, or audio models.
- If you add only embedding models, the key or group cannot use chat, image, or audio models.
- To allow multiple modalities, include at least one model from each modality you want to permit.
Resolution order
Requesty resolves the approved set of models for a request using four layers. The most specific layer that has a non empty list wins:- If the API key has an attached access list, only models in that list are allowed.
- Otherwise, if any of the groups the key belongs to has an attached access list, the request is allowed if any of those group lists include the model.
- Otherwise, if the organization has a group default access list configured, that list is used.
- Otherwise, the organization wide Approved Models list is used.
- If nothing is configured at any level, every model in the Requesty catalog is allowed.
provider violates policy error and does not forward the request to the upstream provider.
Multi group keys
An API key can belong to a group, and an organization member can belong to multiple groups. When resolving the allowed set, Requesty takes the union of the lists attached to the groups that own the key. If a group has no list attached, that group falls back to the organization’s group default access list (if configured). This makes it easy to give a user a base permission set from one group and add additional capabilities through a second group.Examples
- Tighten one production key. Engineering has a group with no access list, so every key in that group falls back to the group default access list (or Approved Models if no default is set). You attach a Production access list with just two models to one specific production API key. That key is now restricted to those two models; every other engineering key still sees the broader list.
- Two groups, one user. A user is in both Engineering (access list of 10 models) and Research (access list of 4 models, two of which overlap). A key owned by that user with no access list of its own can use the union: 12 models. Adding Production directly to the key reduces it to whatever is in Production.
- Admin-only policy. You create a Restricted — Compliance access list marked as restricted. Only org admins can attach this list to groups or API keys. Group admins cannot assign it themselves, ensuring that the compliance policy is only applied through a controlled review process.
- Baseline for all groups. You set a group default access list with your most commonly used models. New groups automatically inherit this list without any manual setup. Teams that need a different set can still have a specific list attached to override the default.
Related
- Approved Models: the organization wide allowlist that access lists narrow further.
- Groups: how to organize members and API keys into teams that share an access list.
- API Limits: per key and per group budgets that work alongside access lists.
- EU Routing: tag the models you allow with their geolocation when building region scoped lists.