

1. Create a Requesty API key
- Open the API Keys page in the Requesty platform.
- Click Create Key, give it a name such as
Langdock, and copy the key.
2. Add the key in Langdock
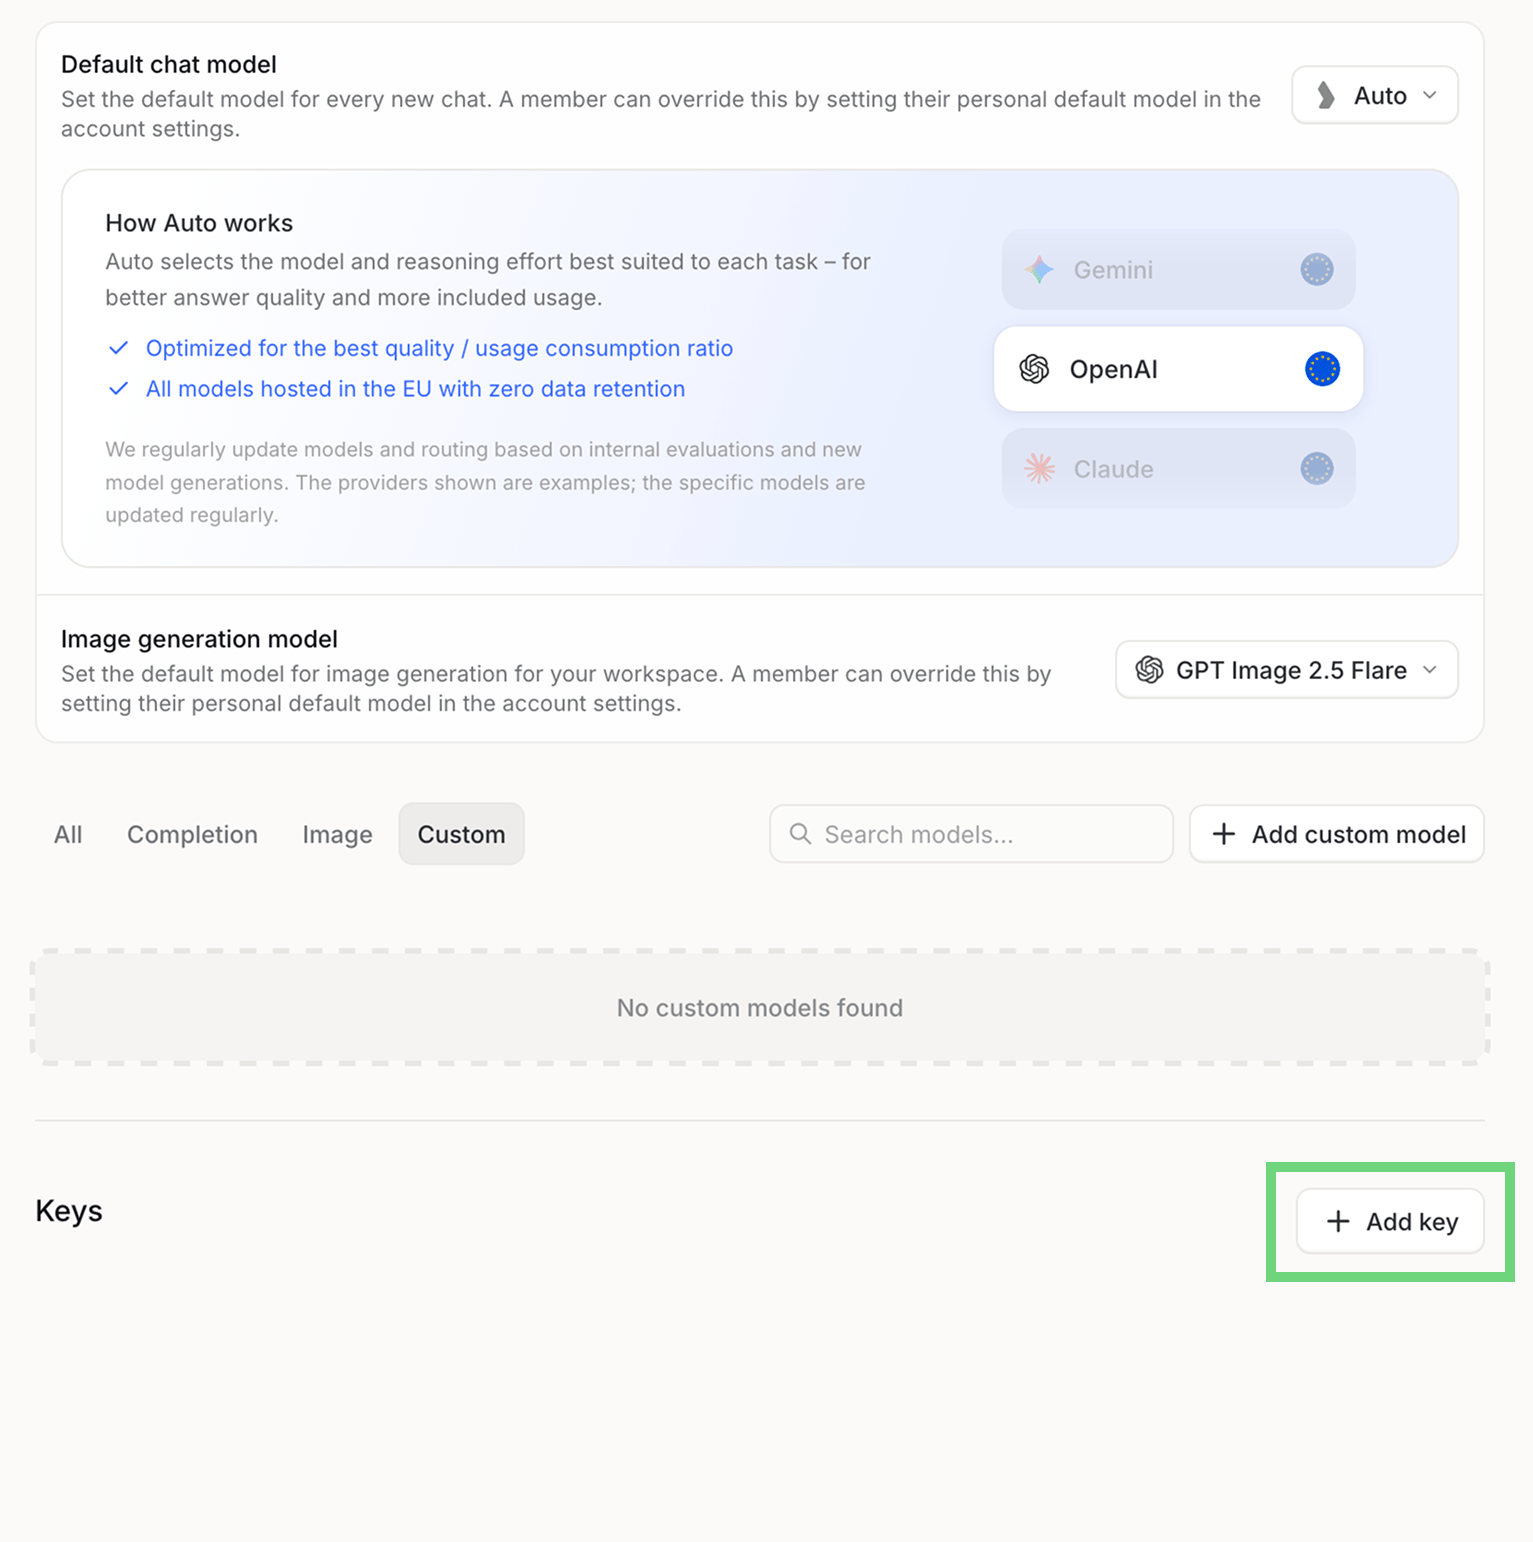
- In Langdock go to Settings > Models and scroll down to Keys.
- Click Add key.
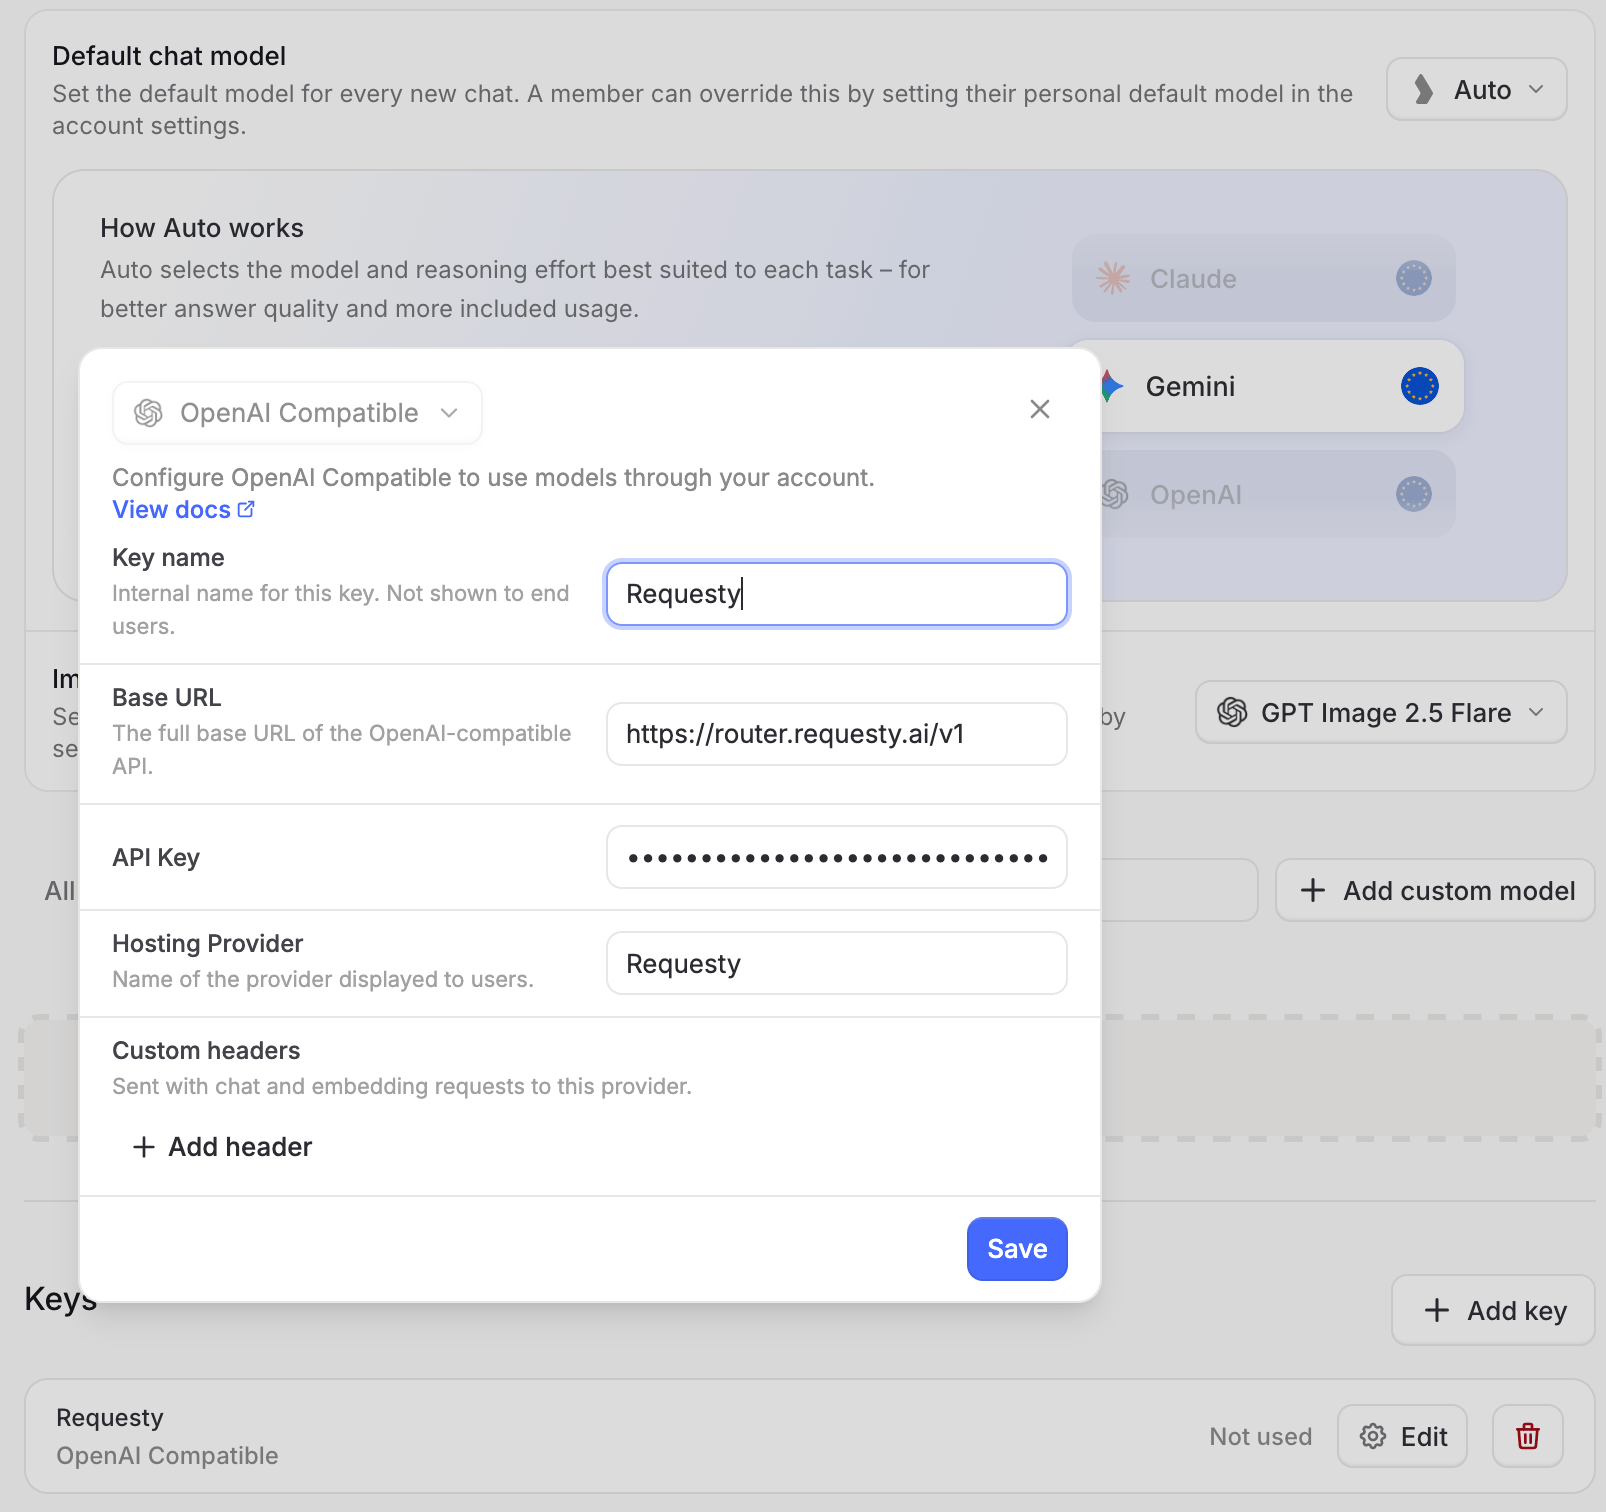
- Choose OpenAI Compatible as the provider type and fill in the form:
- Click Save. The key appears under Keys with the status
Not useduntil a model references it.
3. Add models as custom models
Langdock does not fetch the model list from the provider. Every model you want to use across the organisation has to be added individually as a custom model.3a. Open the custom model wizard
In Settings > Models, select the Custom tab and click Add custom model.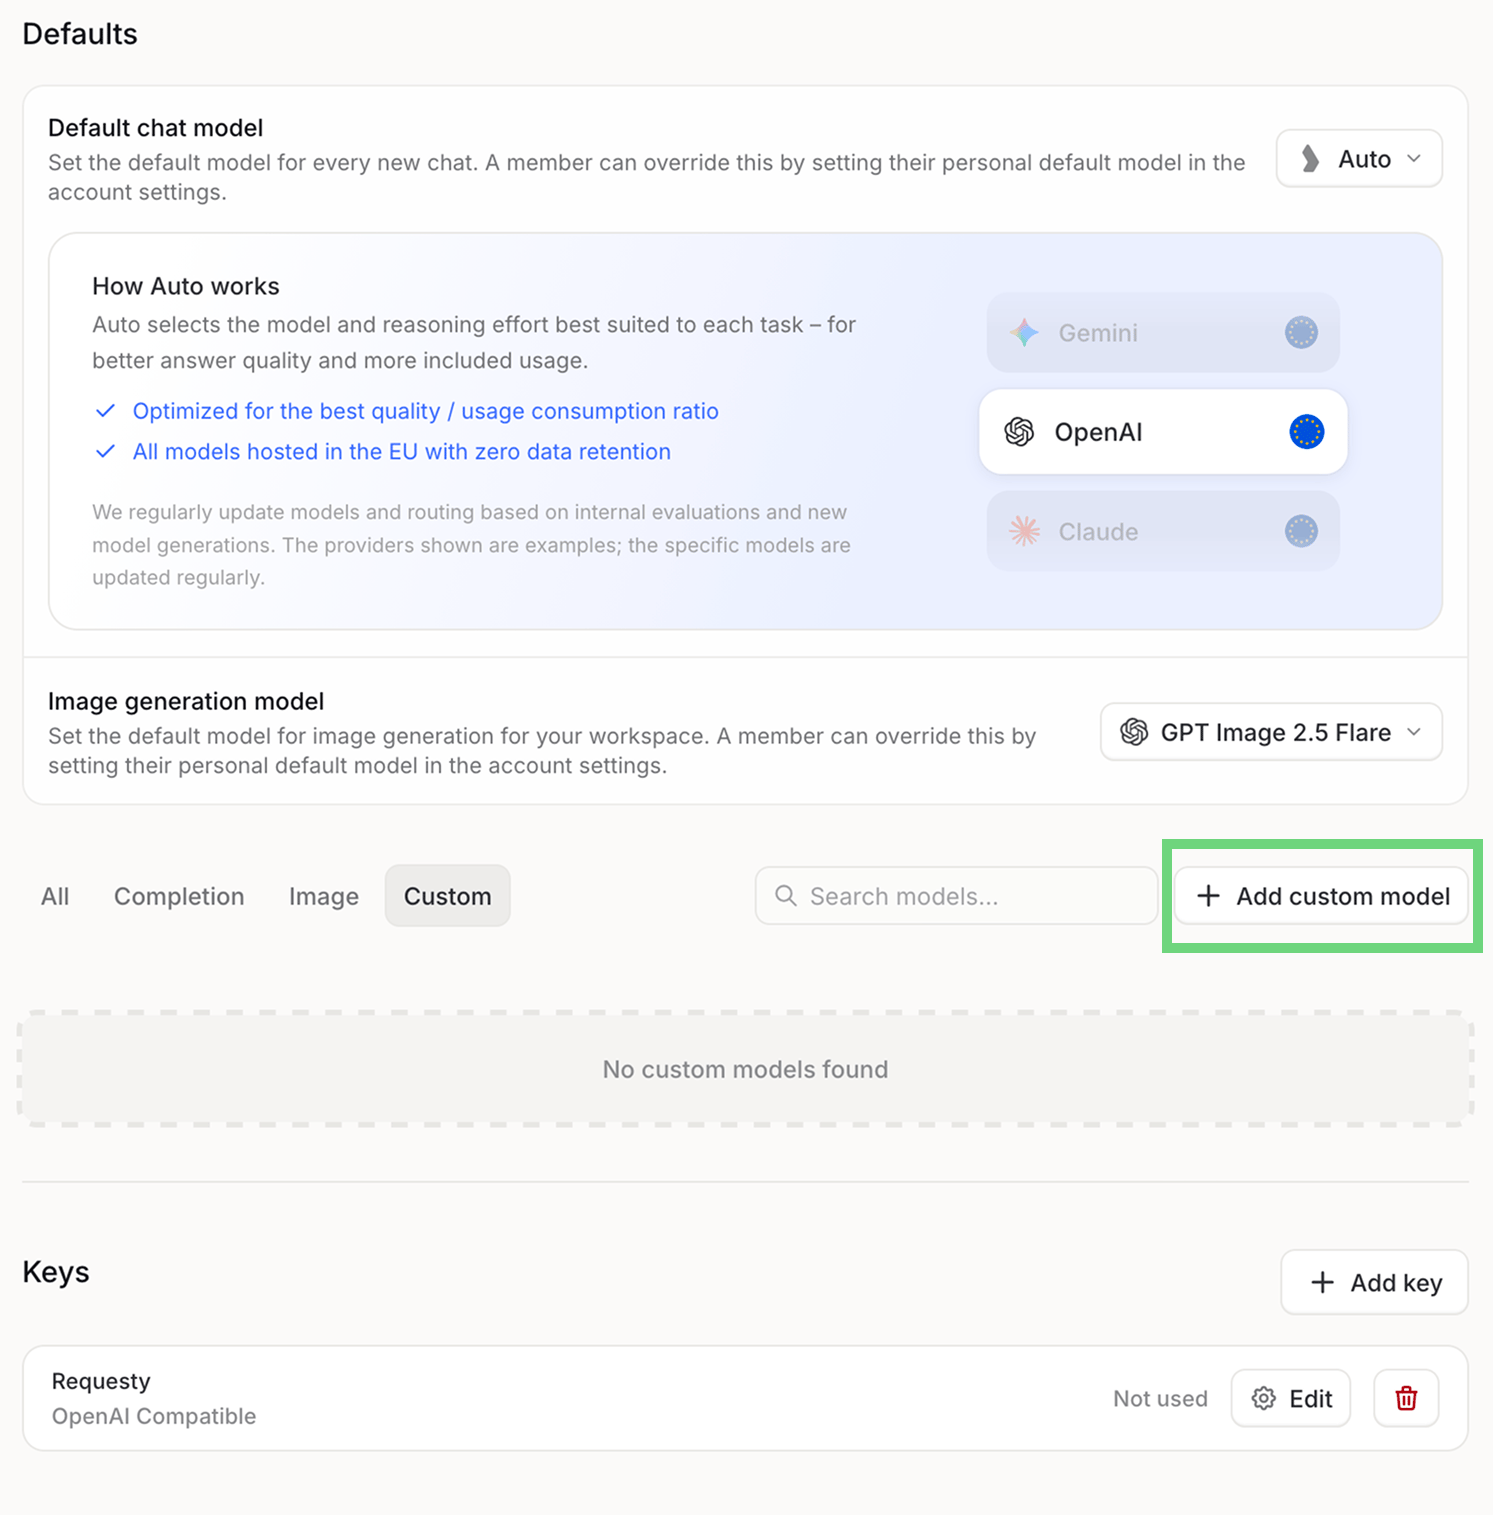
3b. Set up the model manually
The wizard opens on Choose from configurations, which lists Langdock’s pre-configured providers. Ignore that list and click set up manually in the bottom right corner.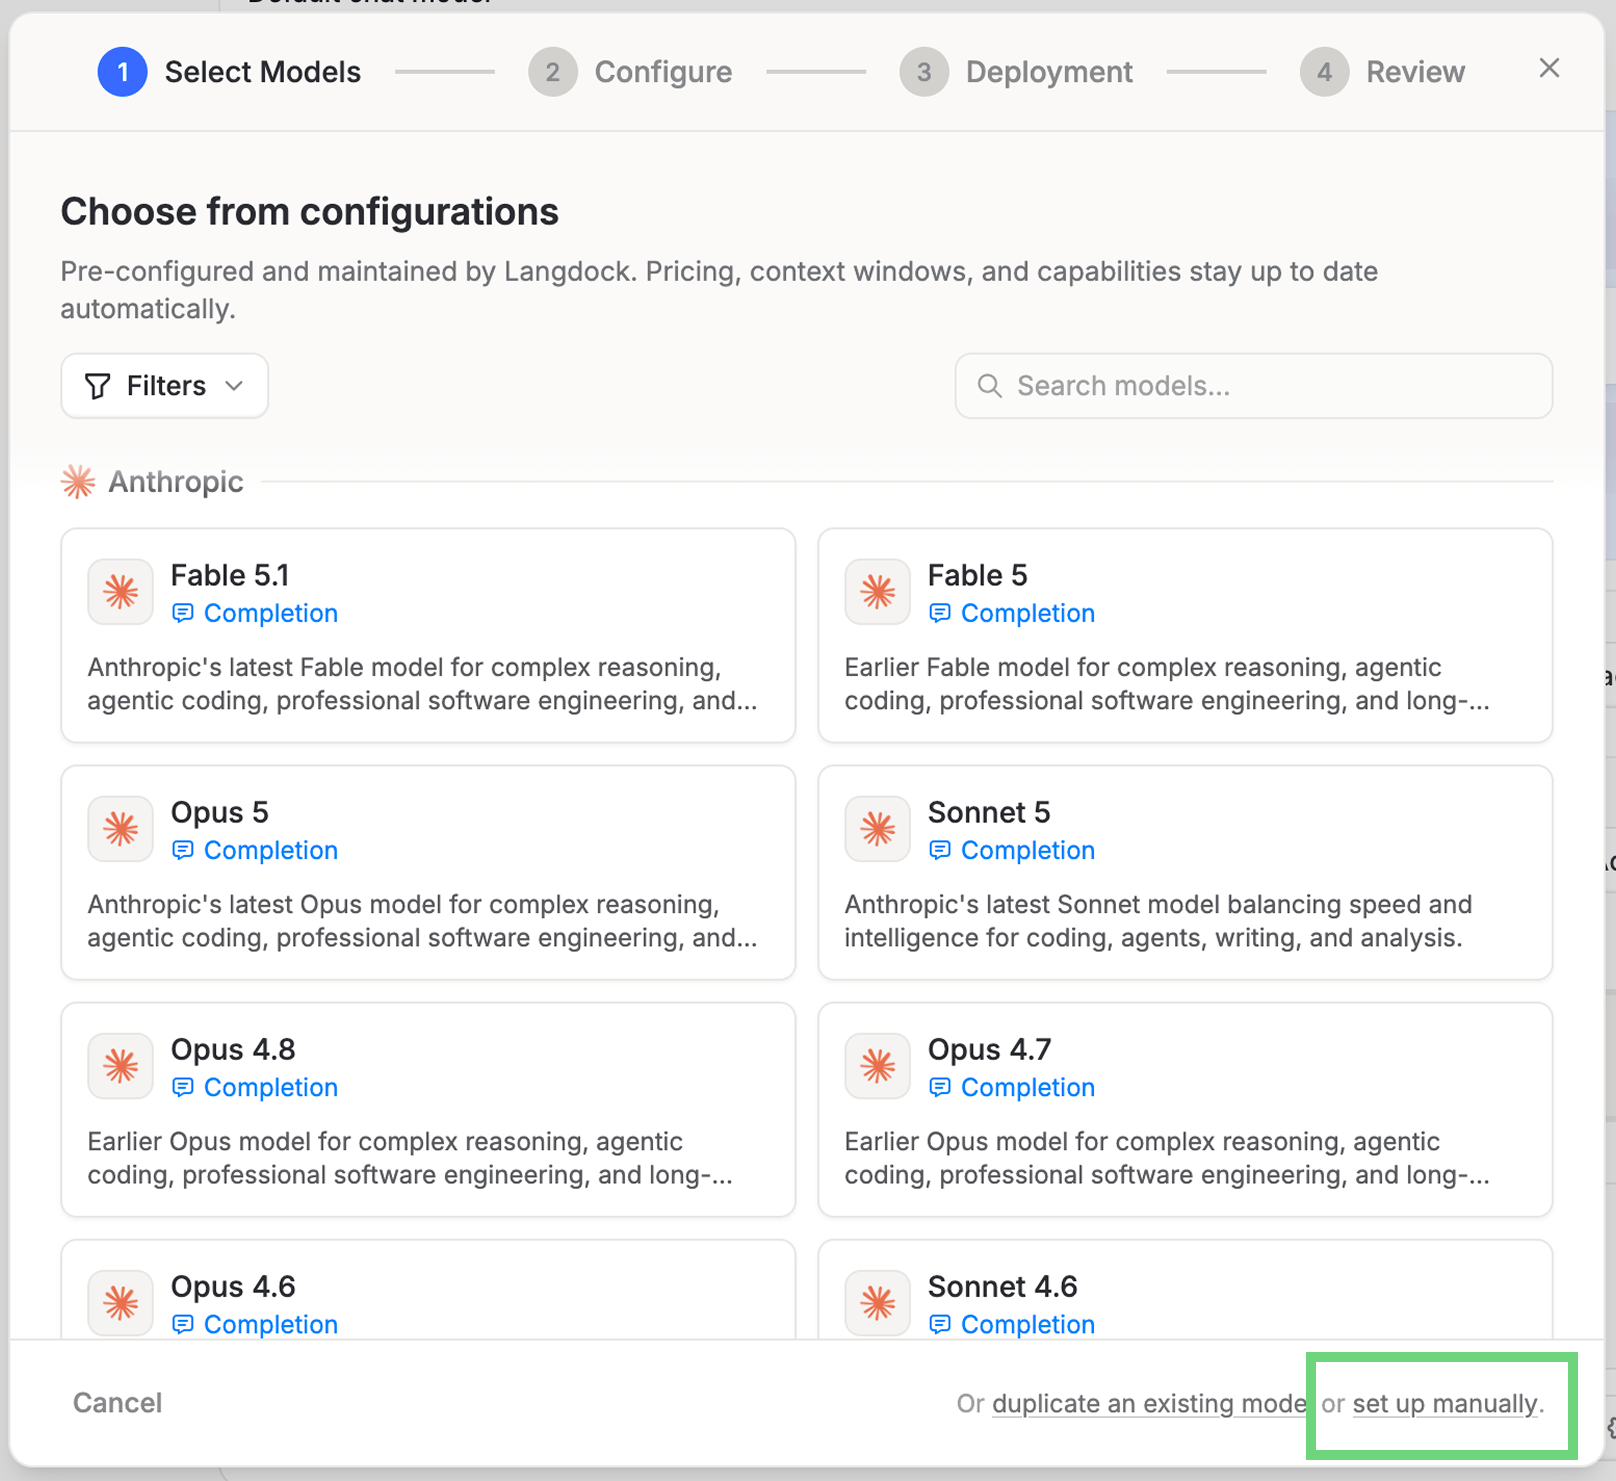
3c. Configure the model
Fill in the Configure step:
Leave Visible to users, Available in agents, and Advanced capability enabled unless you want to restrict the model. Click Continue.
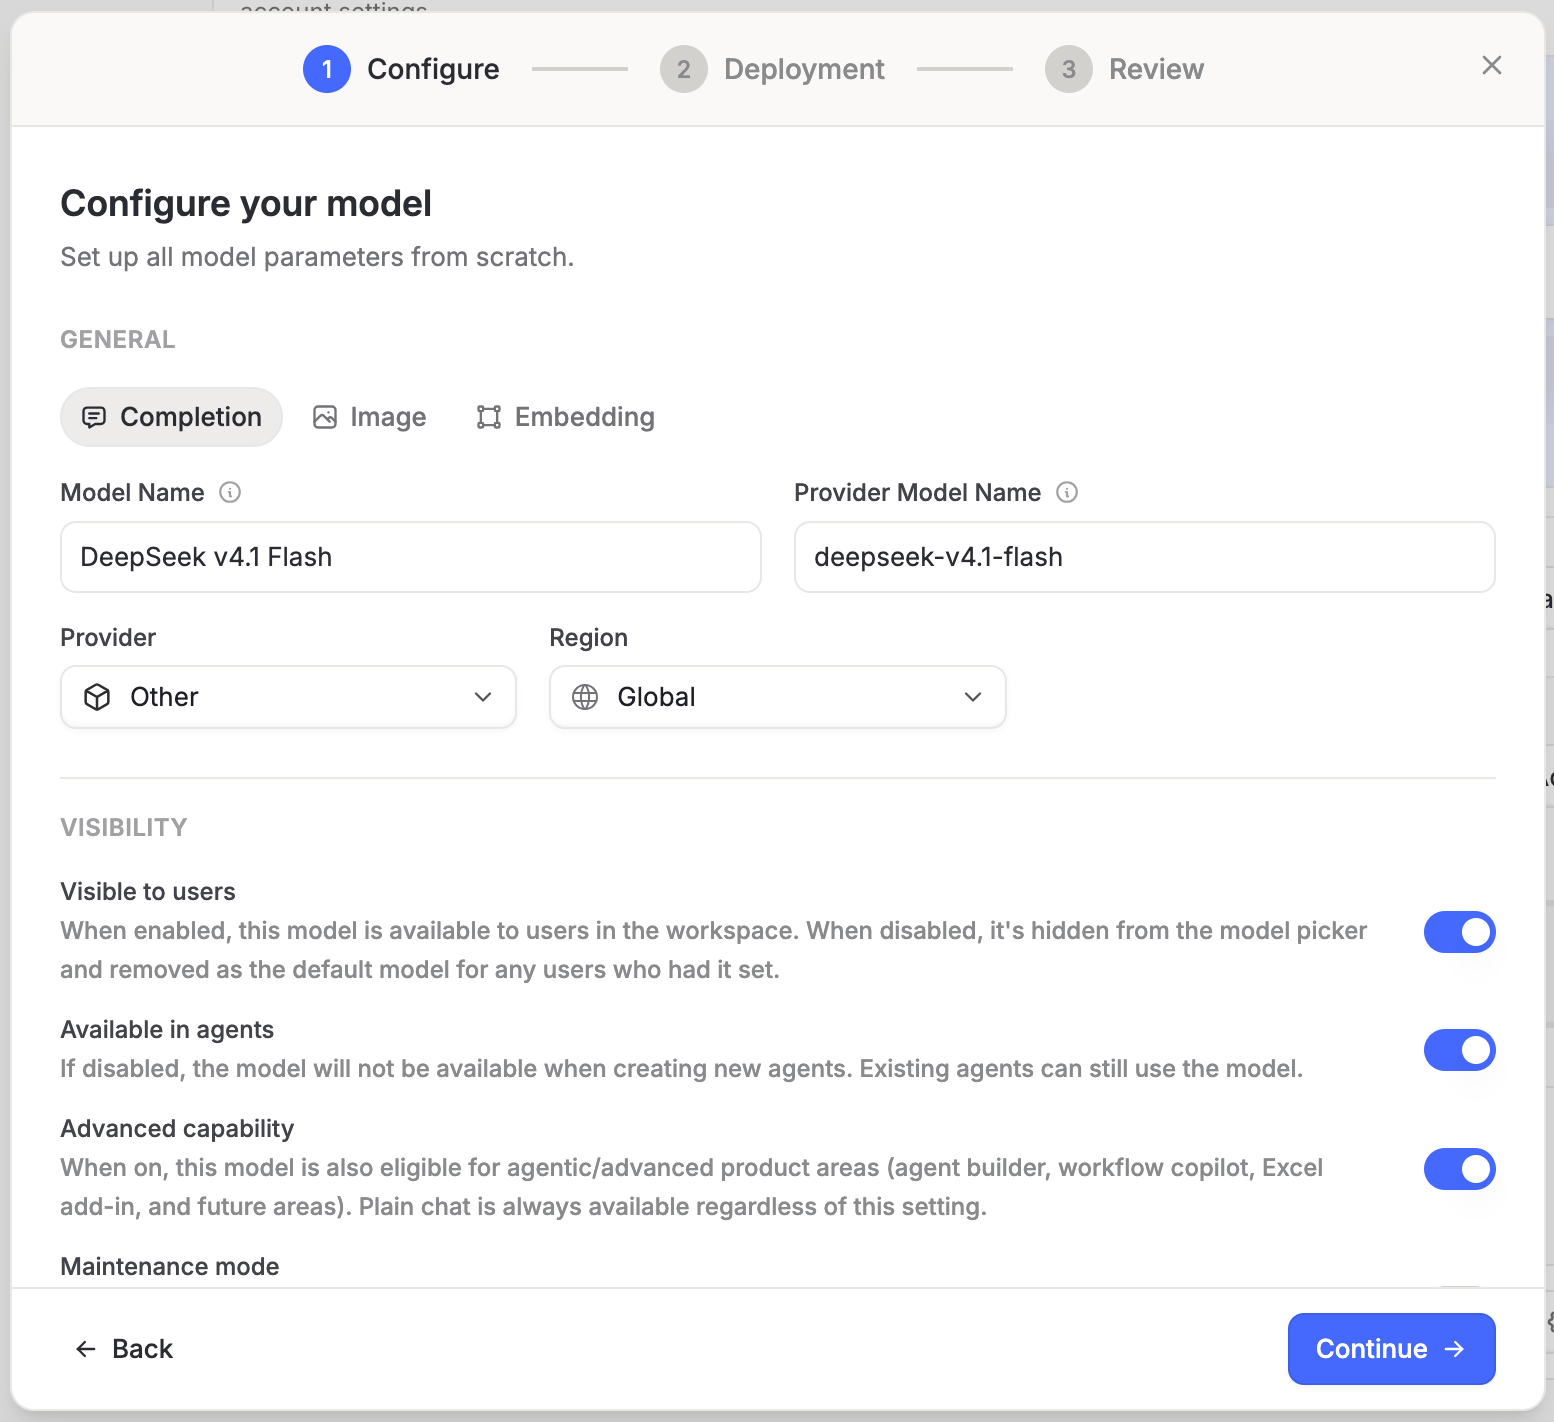
A bare name like
deepseek-v4.1-flash is a Managed Policy: Requesty picks the best provider for that model on every request and handles fallbacks for you. Append @eu (e.g. deepseek-v4.1-flash@eu) to keep routing on EU-hosted endpoints. To pin a specific provider instead, use the provider/model-name ID from the Model Library, for example anthropic/claude-sonnet-4-6. Custom policies from your organisation work too with their policy/ prefix.3d. Configure the deployment and test
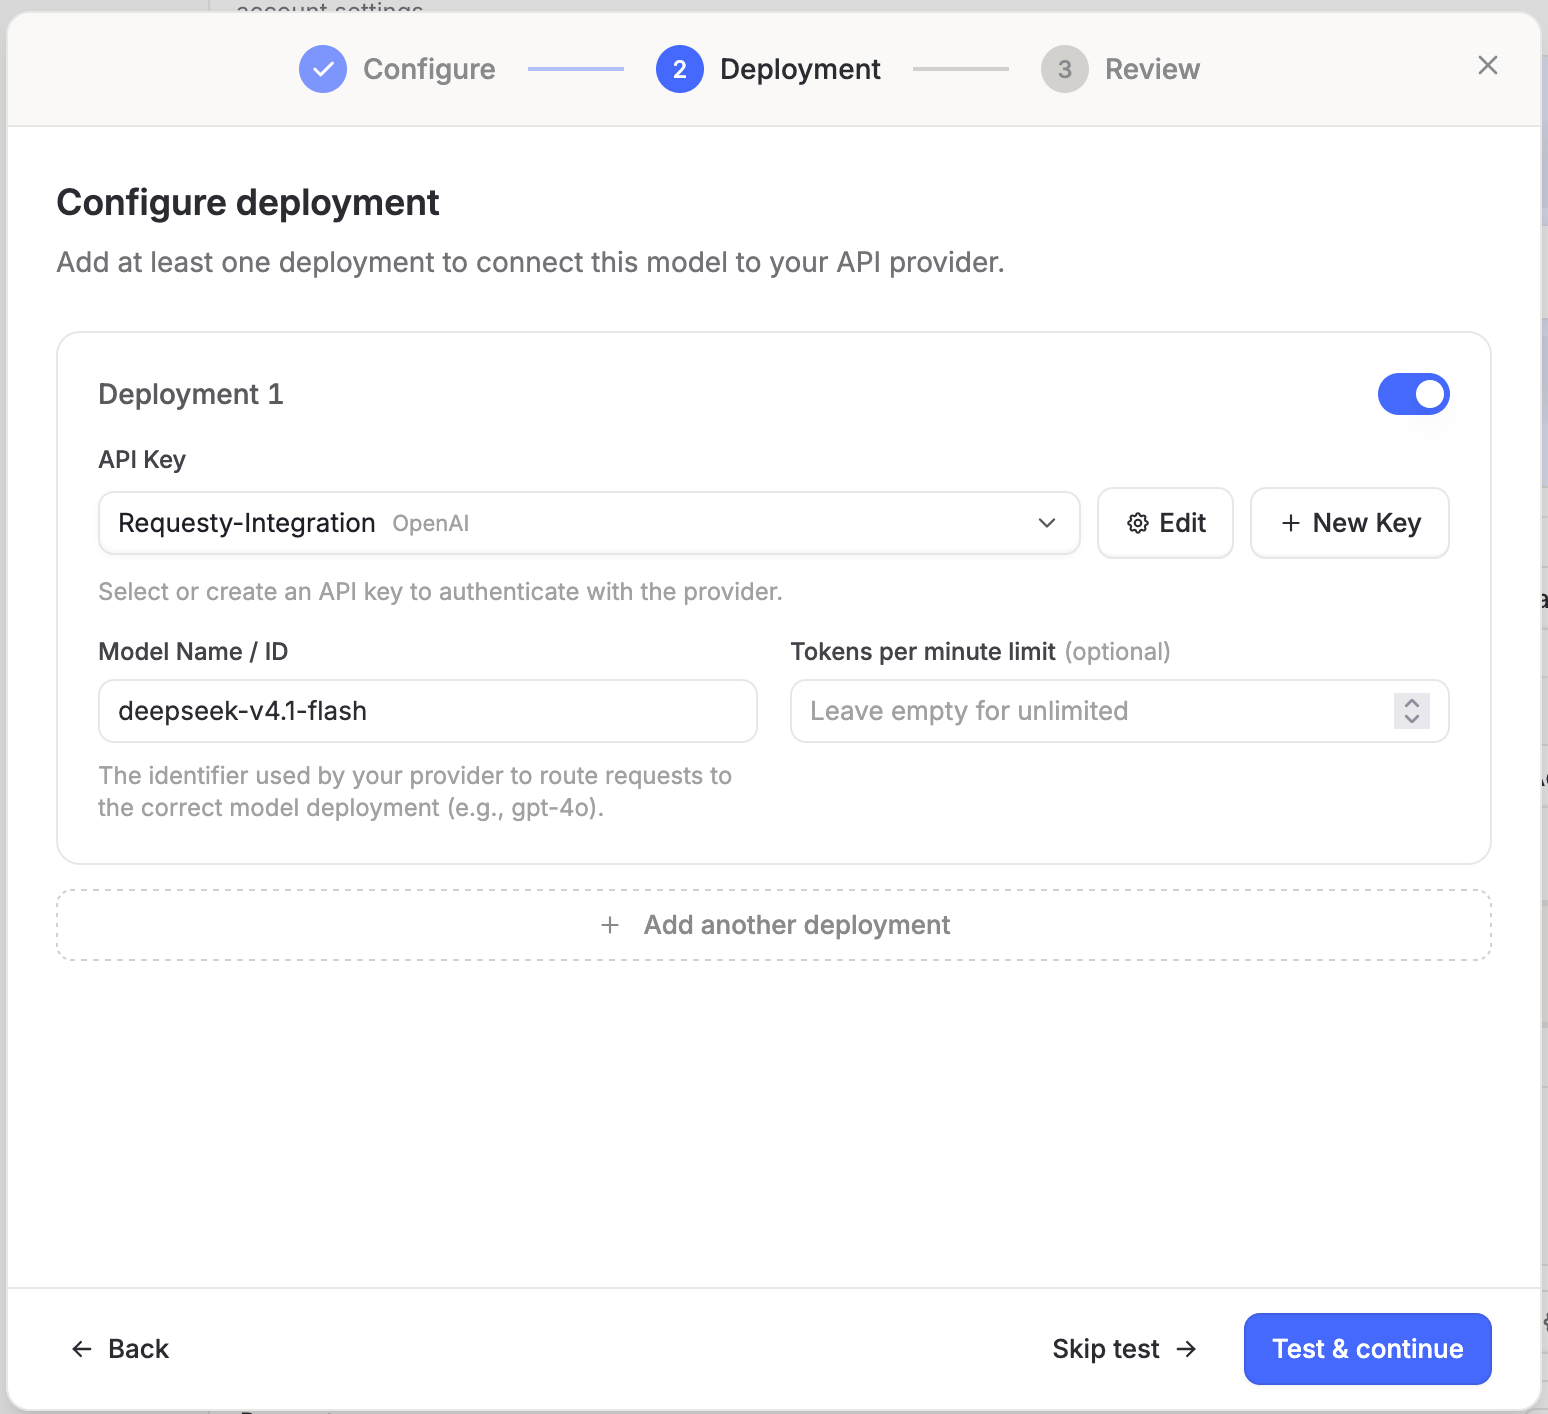
On the Deployment step:- Under API Key, select the Requesty key you created in step 2.
- Set Model Name / ID to the same Requesty model ID.
- Leave Tokens per minute limit empty unless you want Langdock to rate-limit this model.
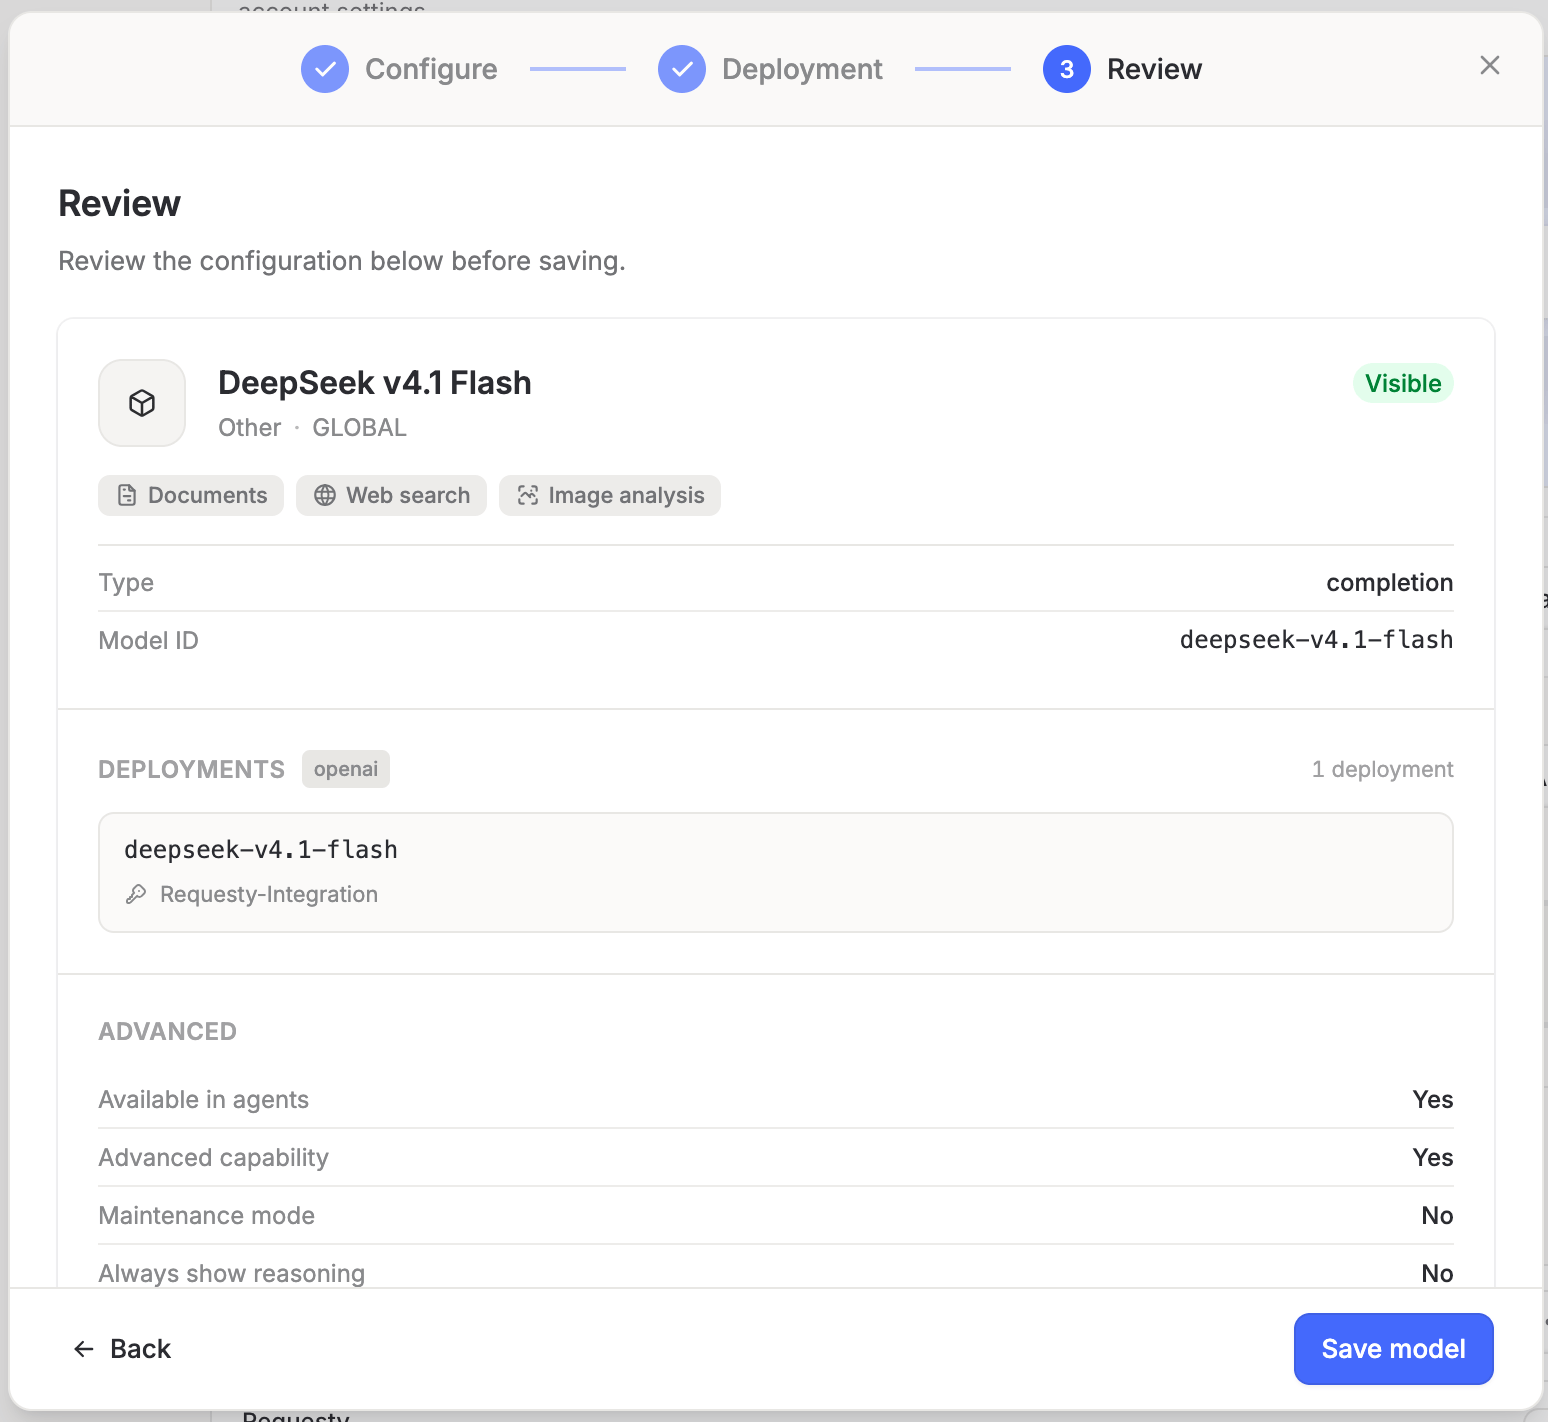
- Click Test & continue. Langdock sends a test request through Requesty and moves to the Review step on success.
4. Test in chat
Open a new chat in Langdock, pick the model from the model selector, and send a message. The response is served through Requesty and shows up in your Requesty logs and analytics.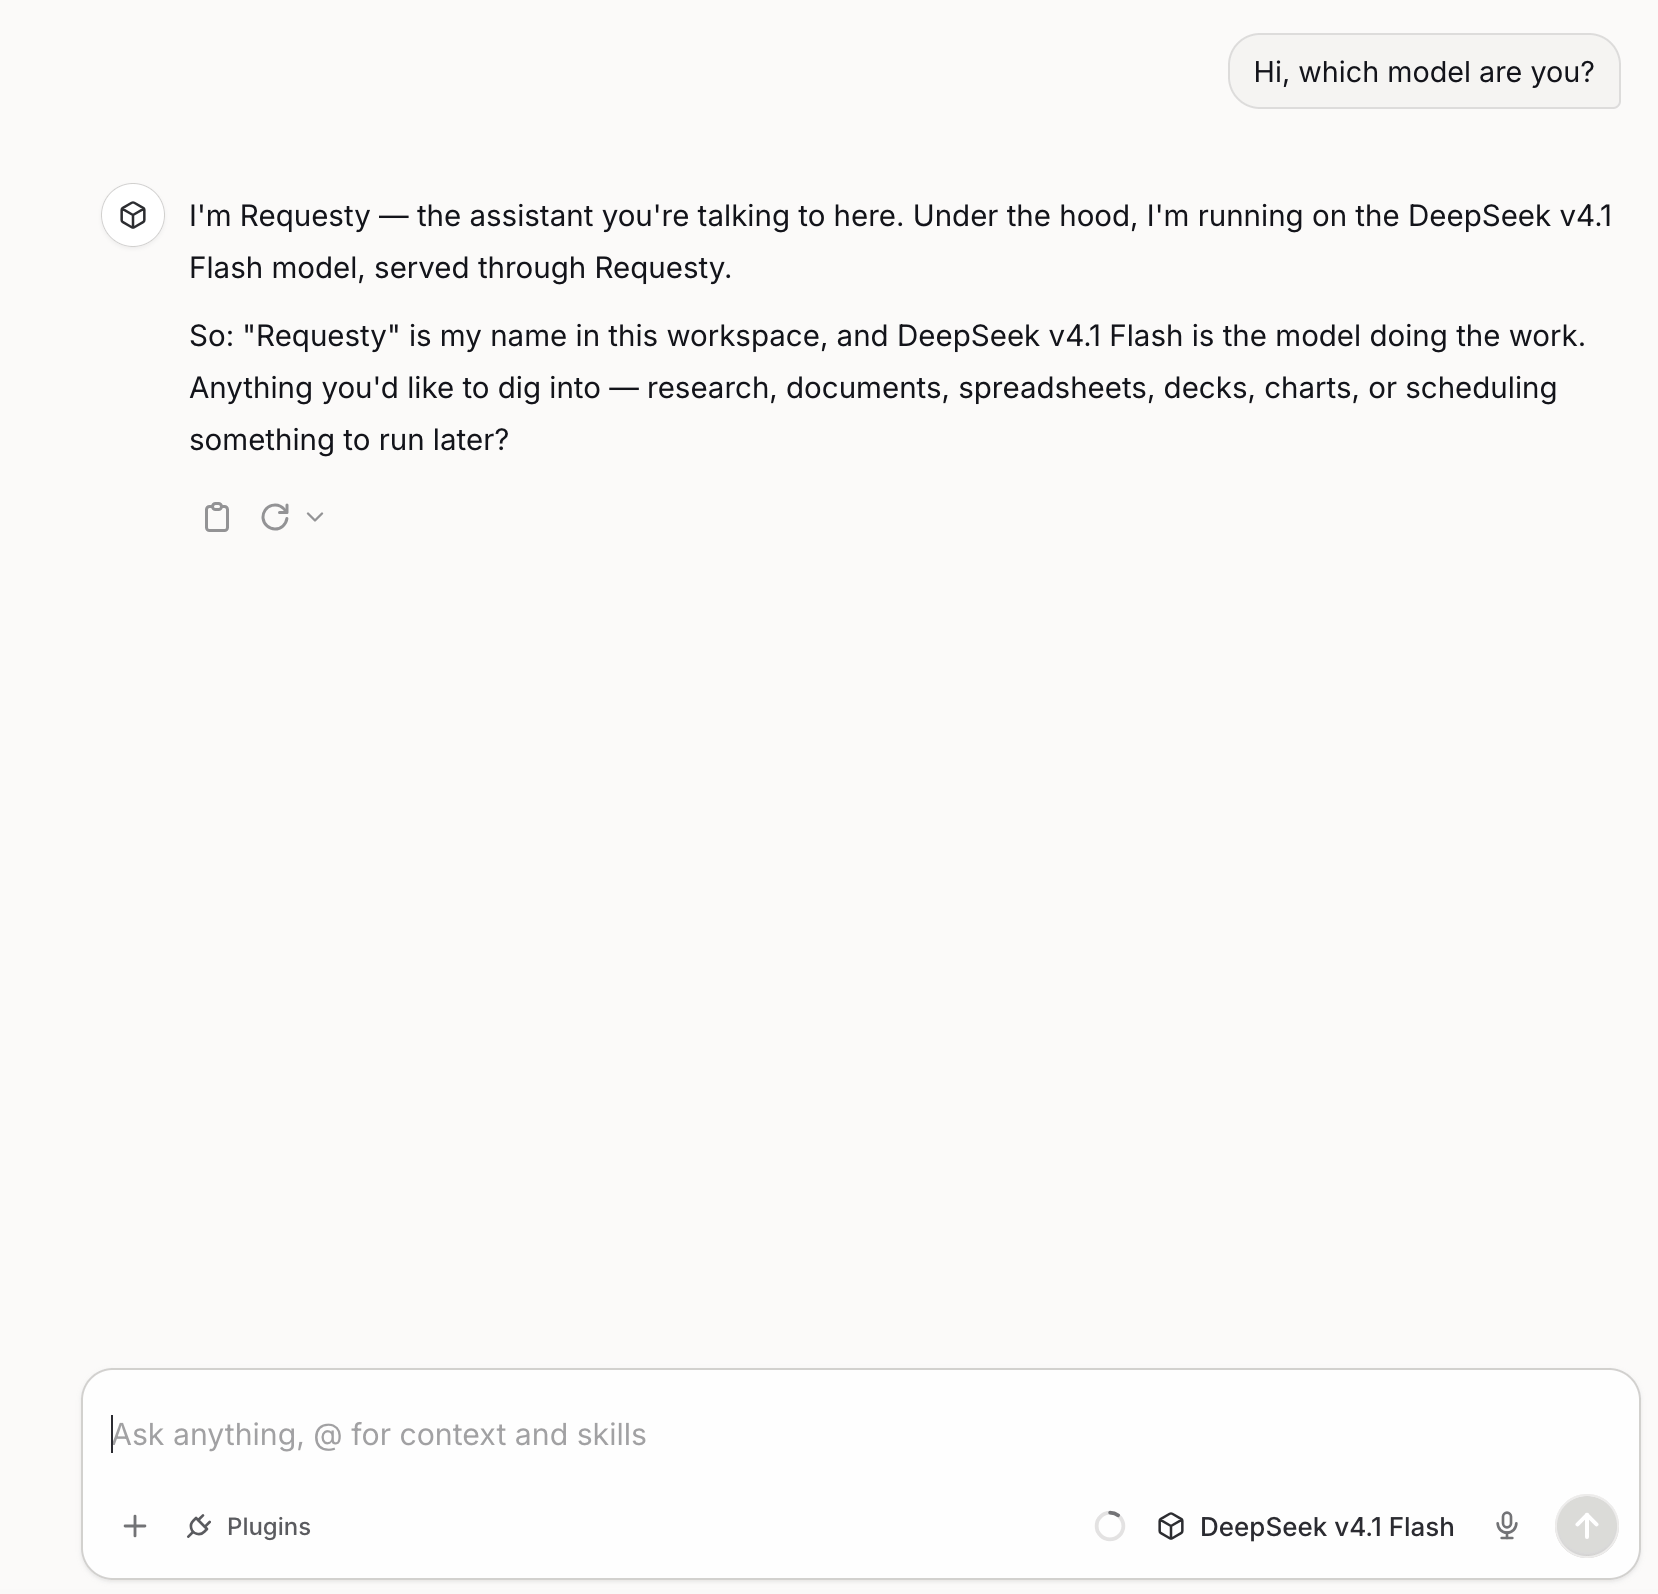
Troubleshooting
- Test & continue fails: confirm the Model Name / ID matches an entry in the Model Library and that the key is allowed to use it under Approved Models.
- 401 Unauthorized: the API key was pasted incorrectly or has been revoked. Edit the key under Keys and paste it again.
- Model missing from the chat selector: make sure Visible to users is enabled on the model and that the deployment toggle is on.