

- Access 600+ models from OpenAI, Anthropic, Google, Mistral, and many other providers through one API key.
- Track and manage your spend in a single location.
- Apply fallback policies, load balancing, and latency routing to keep Copilot responsive.
Requirements
This integration requires Visual Studio Code 1.122 or later. The Custom Endpoint provider reached Stable, and BYOK now works without a GitHub sign-in, in the 1.122 release (May 28, 2026). Use Check for Updates in VS Code to upgrade.
Copilot’s inline suggestions and next edit suggestions (NES) still require a GitHub sign-in. BYOK powers chat, tools, and MCP servers only.
Prerequisites
- VS Code 1.122 or later with the GitHub Copilot Chat extension installed.
- A Requesty API key from the API Keys page.
Configuration
1. Open Manage Language Models
In the Chat view, open the model picker and select the gear icon, then Manage Language Models. You can also run Chat: Manage Language Models from the Command Palette.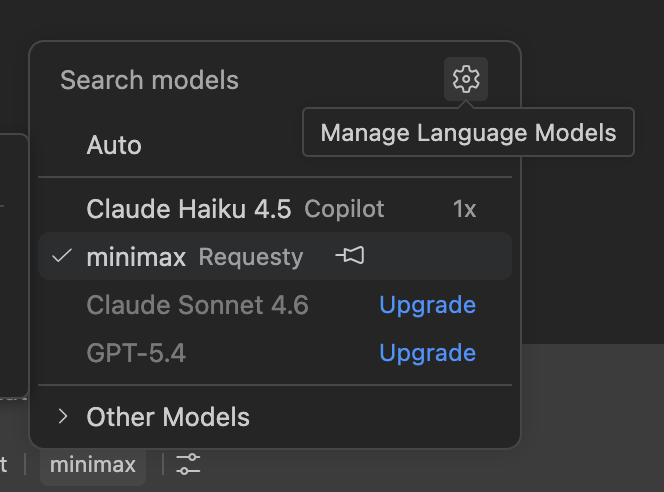
2. Add Requesty as a Custom Endpoint
Select Add Models and choose Custom Endpoint from the provider list.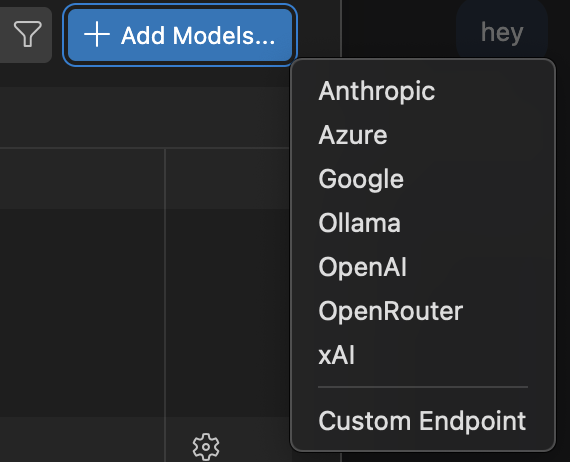
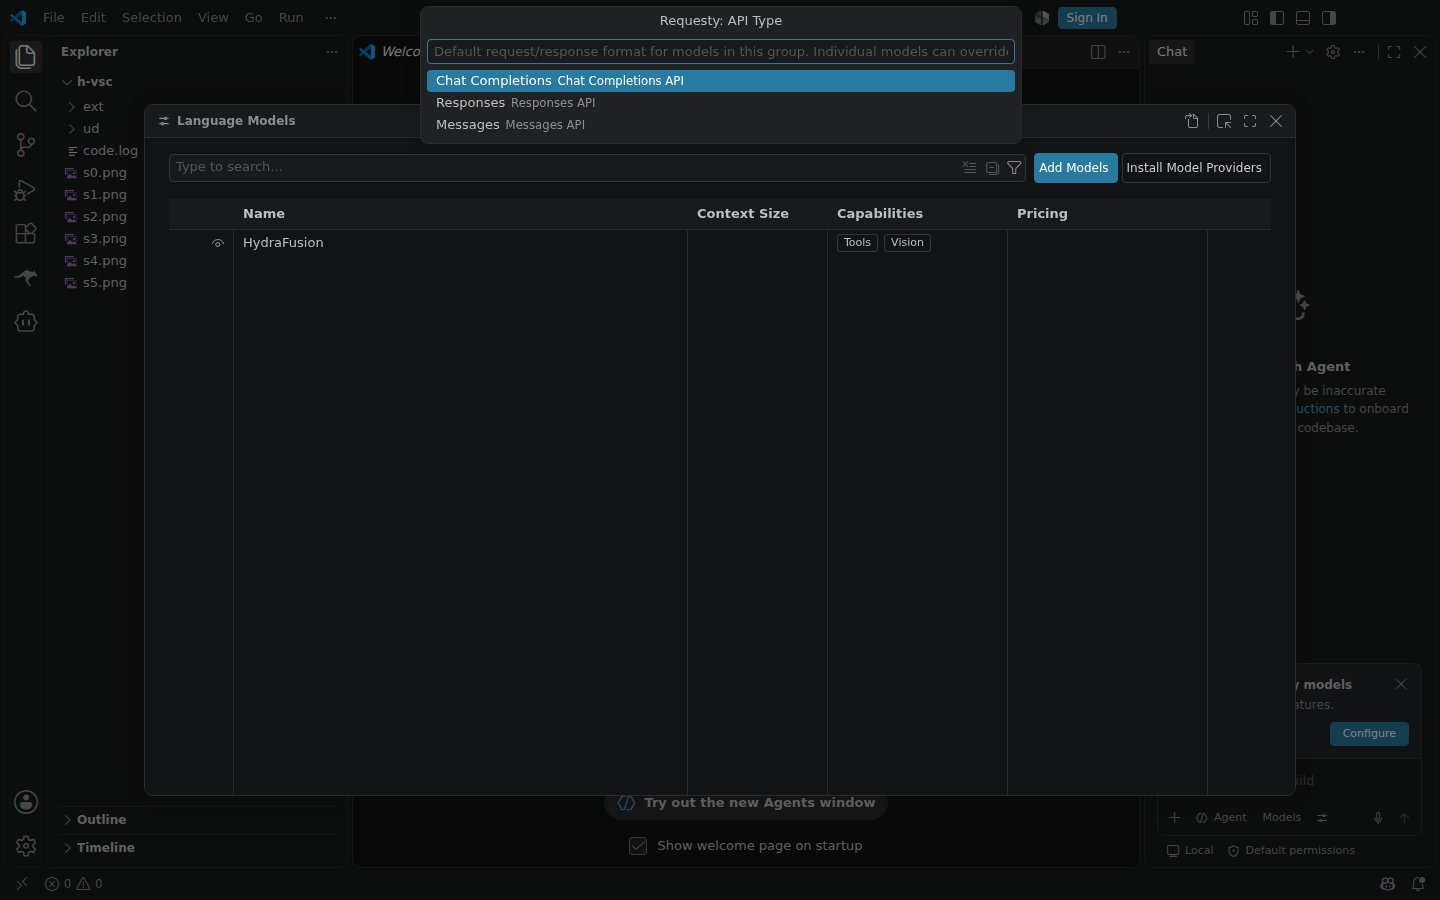
${input:chat.lm.secret.xxxxxxxx}.
3. Add your models
VS Code openschatLanguageModels.json with a model entry for the new group. Set the id to a Requesty model and url to https://router.requesty.ai:
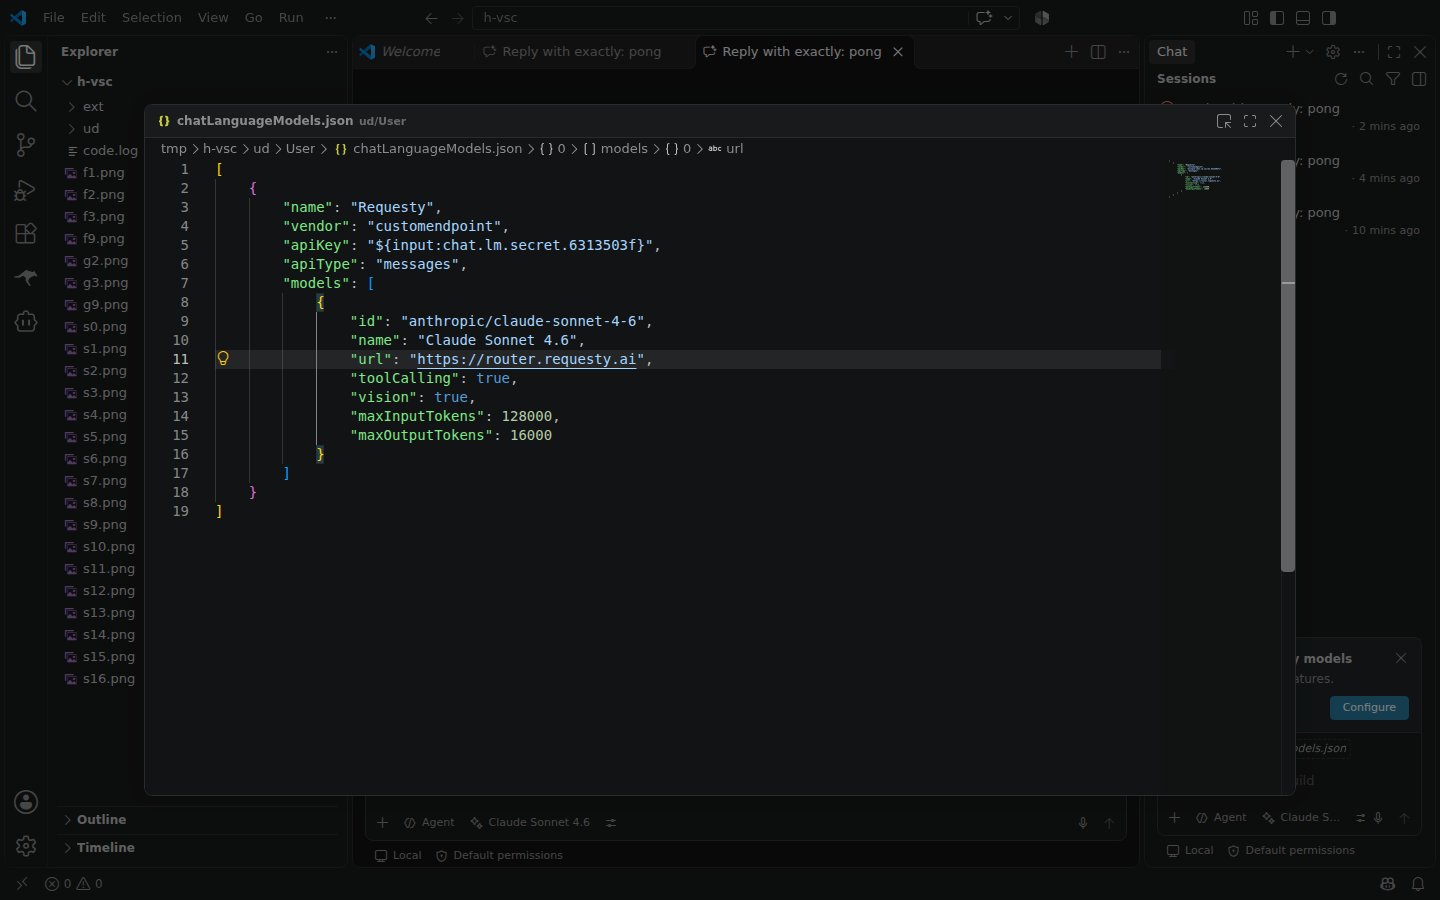
Use the
url without /v1. VS Code appends /v1/messages itself. To add more models later, open Chat: Manage Language Models, select the gear next to the Requesty group, and choose Add Model. The same menu has Update API Key if you need to rotate your key. Do not paste the key into the JSON file directly, VS Code does not read it from there.4. Select a model
After adding the provider, your Requesty models appear in the model picker tagged with Requesty. Pick one to start chatting. You can choose any model from the Model Library. Standard model IDs follow the formatprovider/model-name:
anthropic/claude-sonnet-4-6openai/gpt-5.4
policy/policy-name:
policy/reliable-coding
Utility models
A few flows in VS Code, such as chat title generation, commit message generation, and feedback, use a smaller utility model that normally comes from your Copilot subscription. When you use BYOK while signed out, point those at a Requesty model too:- When the notification appears in the chat input, select Configure.
- Set both
chat.utilityModelandchat.utilitySmallModelto one of your Requesty models.
Verification
Send a simple prompt in Copilot Chat. The expected output is a working response from the model. Then check the Requesty analytics dashboard to confirm the request was logged.Troubleshooting
Sign-in prompts keep appearing
Sign-in prompts keep appearing
On VS Code 1.122+, sign-in prompts are suppressed once a BYOK model is configured. Confirm your VS Code version with Help → About and update if it is below 1.122.
No logs visible in Requesty dashboard
No logs visible in Requesty dashboard
Send a unique, traceable prompt and re-check the analytics dashboard. Confirm the URL is
https://router.requesty.ai and the API key is valid.Models don't appear in the picker
Models don't appear in the picker
If your Requesty models are missing from the model picker, reopen the Manage Language Models view from the Command Palette:
- Open the Command Palette:
Cmd+Shift+P(Mac) orCtrl+Shift+P(Windows/Linux). - Type: Chat: Manage Language Models and select it.