> ## Documentation Index
> Fetch the complete documentation index at: https://docs.requesty.ai/llms.txt
> Use this file to discover all available pages before exploring further.
# Langdock
> Connect Langdock to Requesty and give your workspace access to any model in the Requesty Model Library
[Langdock](https://www.langdock.com) is an enterprise AI workspace for chat, agents, and workflows. It supports OpenAI-compatible providers, so you can point it at Requesty and use any model in the [Model Library](https://app.requesty.ai/model-list) from a single key, with Requesty analytics, approved-model lists, and fallback policies applied to every request.
Setup has three parts: add a Requesty key to Langdock, add each model you want to expose as a custom model, and test it in chat.
## 1. Create a Requesty API key
1. Open the [API Keys page](https://app.requesty.ai/api-keys) in the Requesty platform.
2. Click **Create Key**, give it a name such as `Langdock`, and copy the key.
Optionally restrict which models this key can use with [Approved Models](/features/approved-models) or an [Access List](/features/access-lists). Langdock only exposes the models you add manually in step 3, but limiting the key is good hygiene.
## 2. Add the key in Langdock
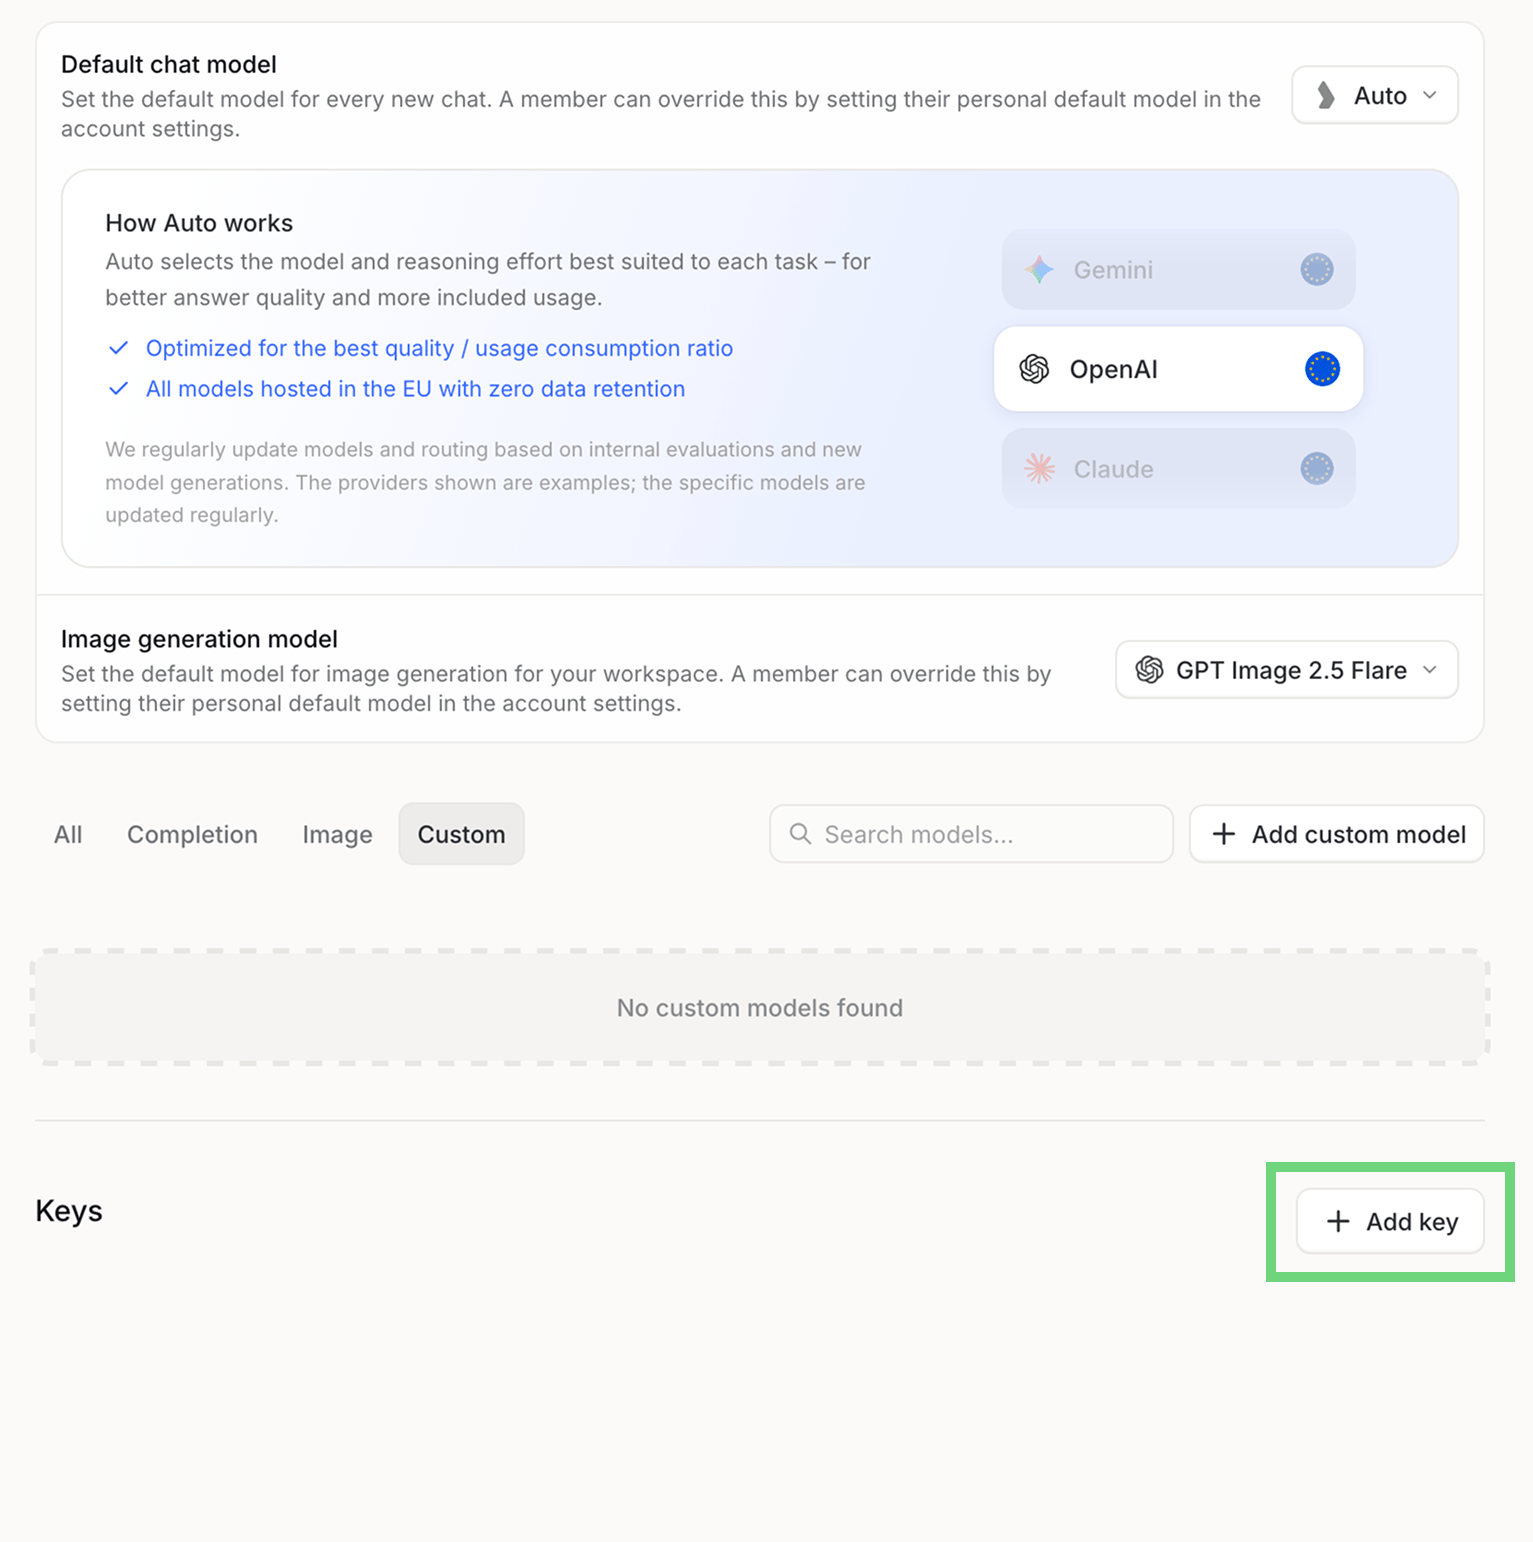
1. In Langdock go to **Settings > Models** and scroll down to **Keys**.
2. Click **Add key**.
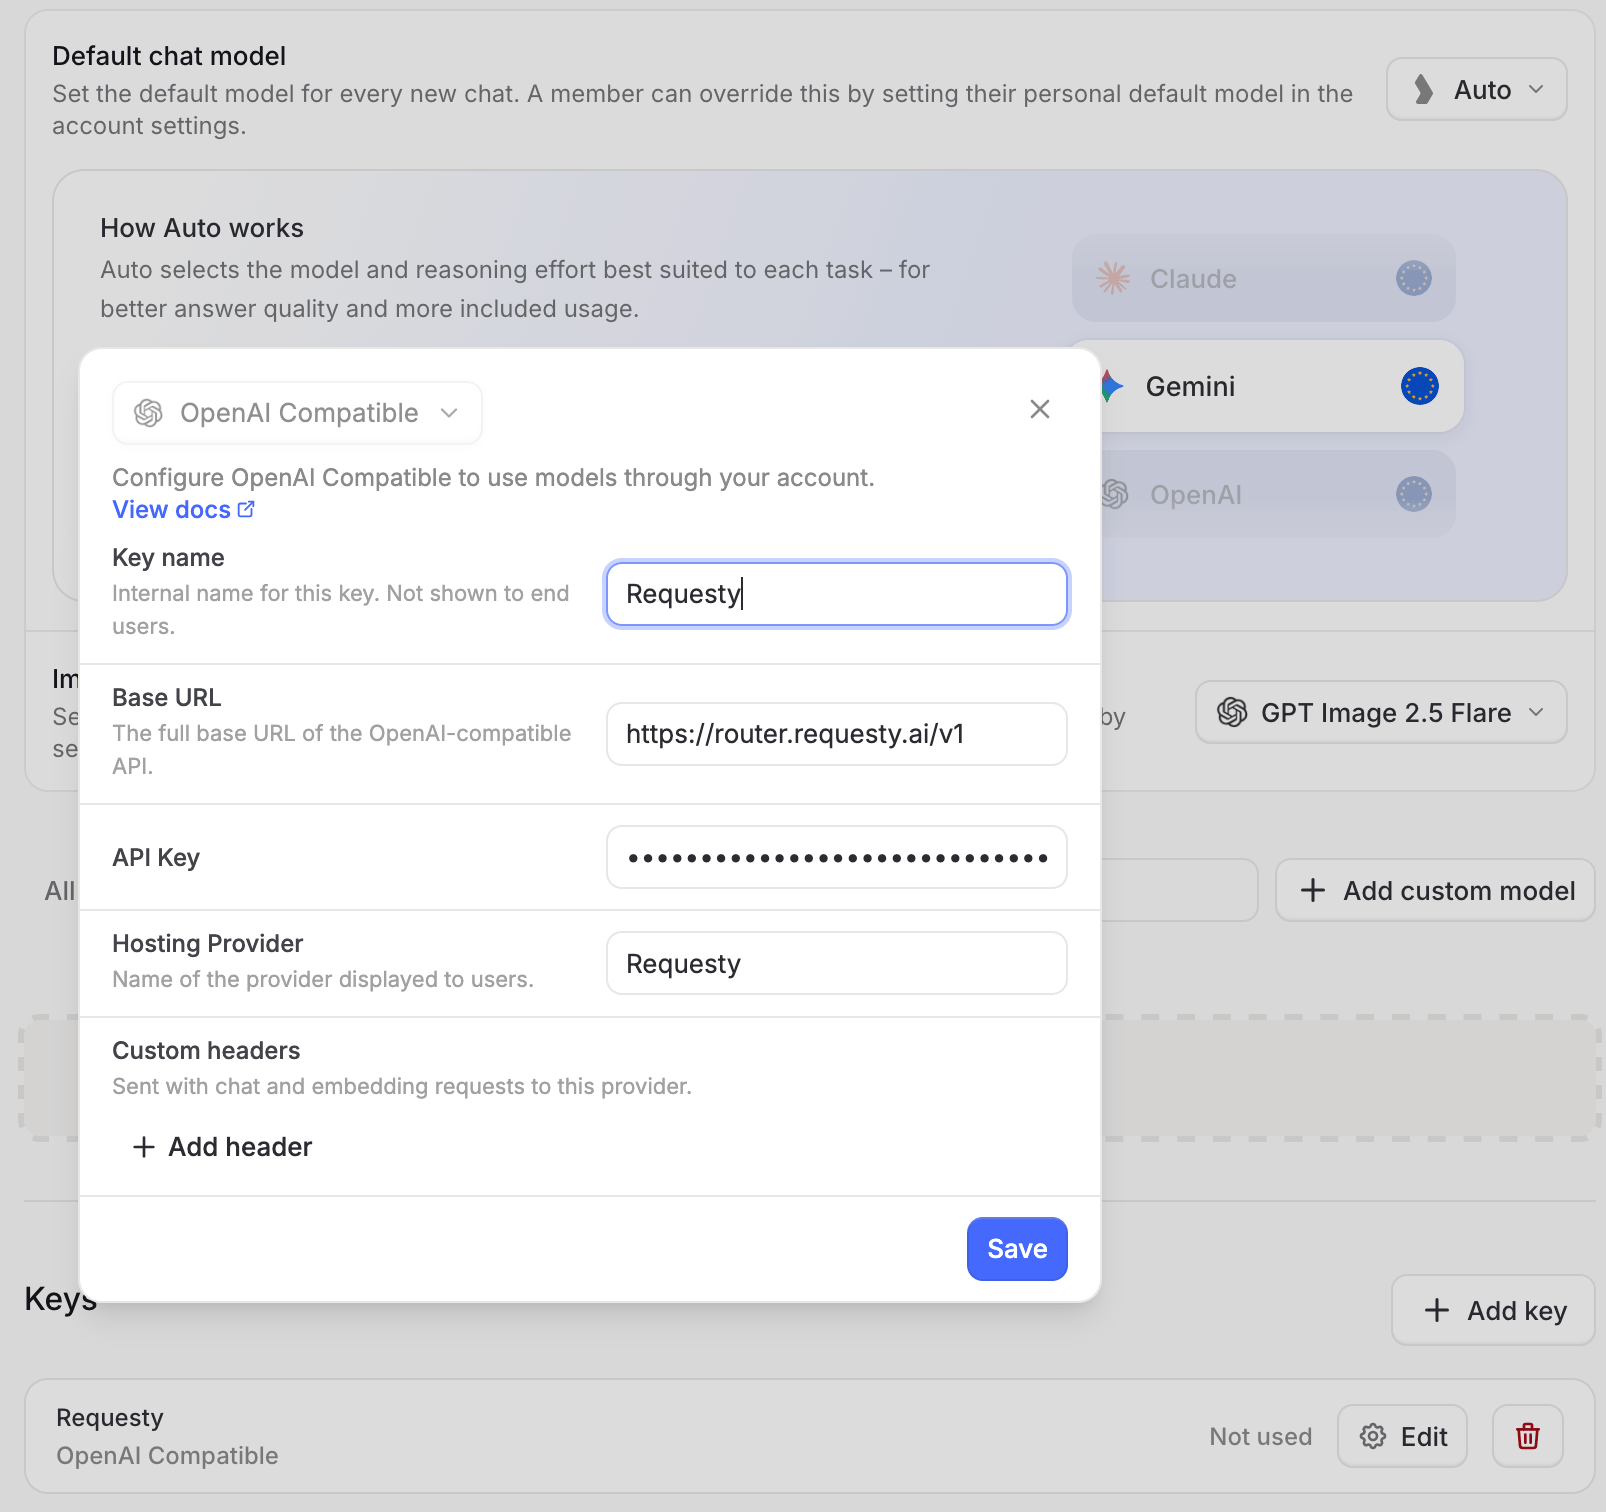
 3. Choose **OpenAI Compatible** as the provider type and fill in the form:
| Field | Value |
| - | - |
| Key name | Any internal name, e.g. `Requesty` |
| Base URL | `https://router.requesty.ai/v1` (or `https://router.eu.requesty.ai/v1` for EU-only routing) |
| API Key | The Requesty key from step 1 |
| Hosting Provider | `Requesty` (shown to your users) |
| Custom headers | Leave empty |
4. Click **Save**. The key appears under **Keys** with the status `Not used` until a model references it.
3. Choose **OpenAI Compatible** as the provider type and fill in the form:
| Field | Value |
| - | - |
| Key name | Any internal name, e.g. `Requesty` |
| Base URL | `https://router.requesty.ai/v1` (or `https://router.eu.requesty.ai/v1` for EU-only routing) |
| API Key | The Requesty key from step 1 |
| Hosting Provider | `Requesty` (shown to your users) |
| Custom headers | Leave empty |
4. Click **Save**. The key appears under **Keys** with the status `Not used` until a model references it.
 ## 3. Add models as custom models
Langdock does not fetch the model list from the provider. Every model you want to use across the organisation has to be added individually as a custom model.
### 3a. Open the custom model wizard
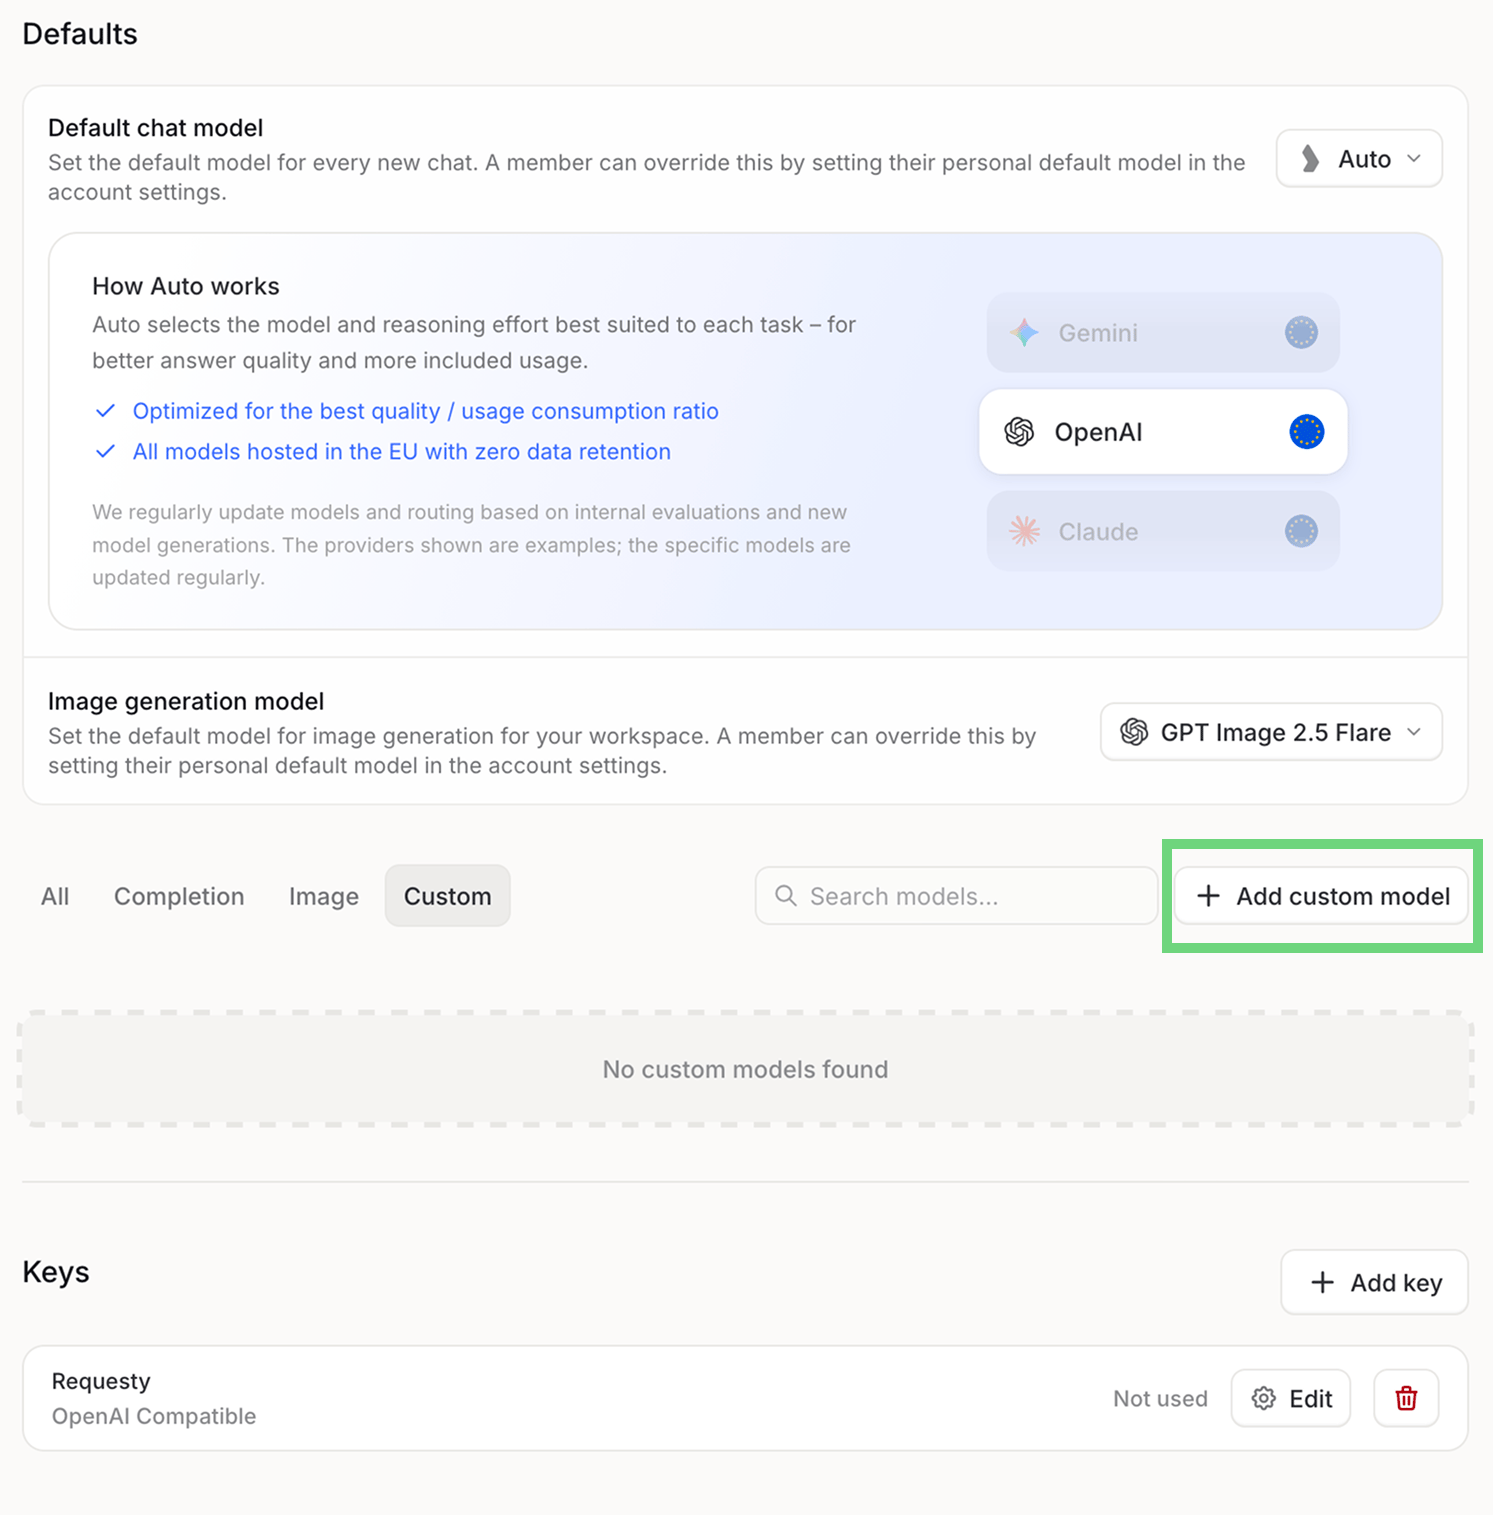
In **Settings > Models**, select the **Custom** tab and click **Add custom model**.
## 3. Add models as custom models
Langdock does not fetch the model list from the provider. Every model you want to use across the organisation has to be added individually as a custom model.
### 3a. Open the custom model wizard
In **Settings > Models**, select the **Custom** tab and click **Add custom model**.
 ### 3b. Set up the model manually
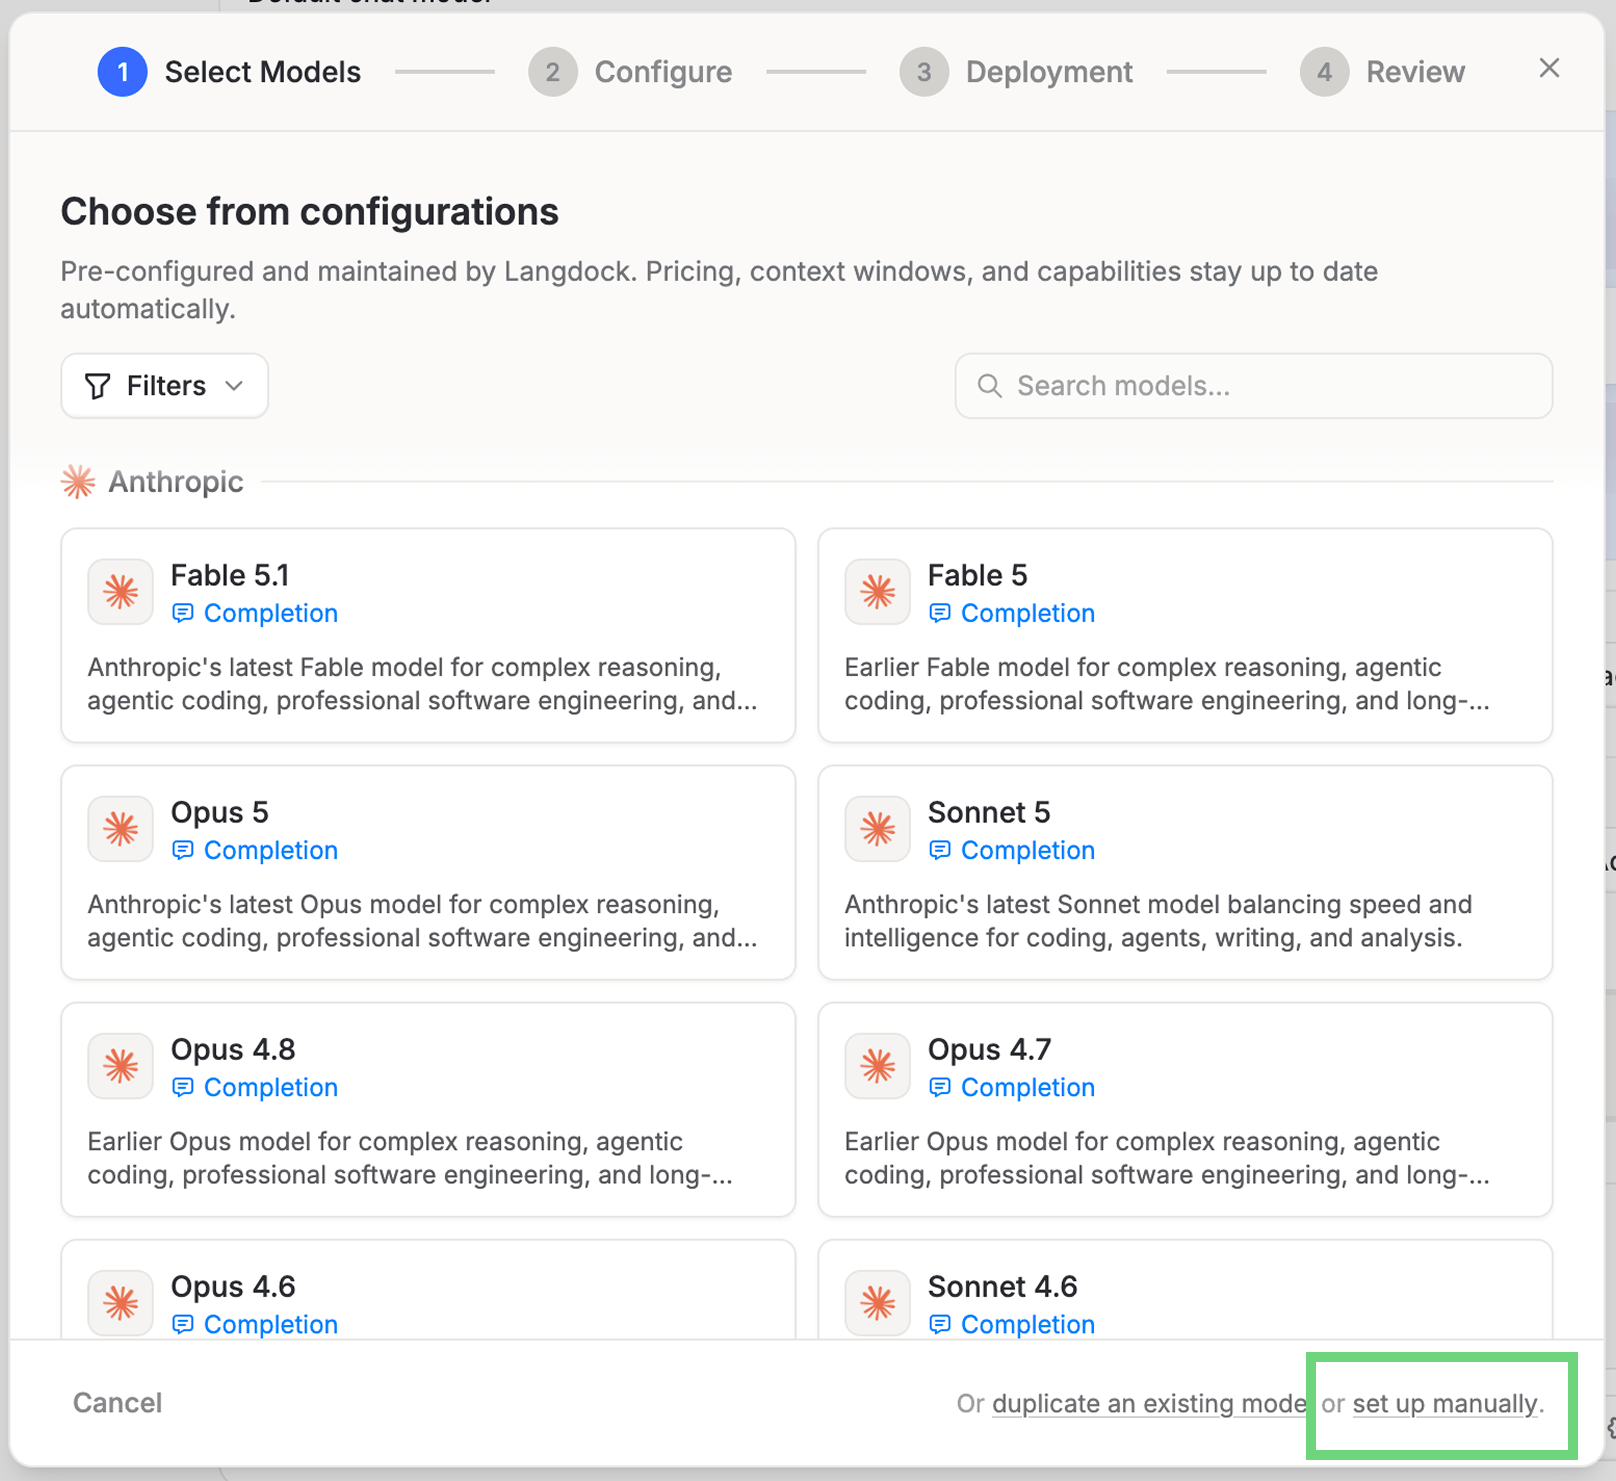
The wizard opens on **Choose from configurations**, which lists Langdock's pre-configured providers. Ignore that list and click **set up manually** in the bottom right corner.
### 3b. Set up the model manually
The wizard opens on **Choose from configurations**, which lists Langdock's pre-configured providers. Ignore that list and click **set up manually** in the bottom right corner.
 ### 3c. Configure the model
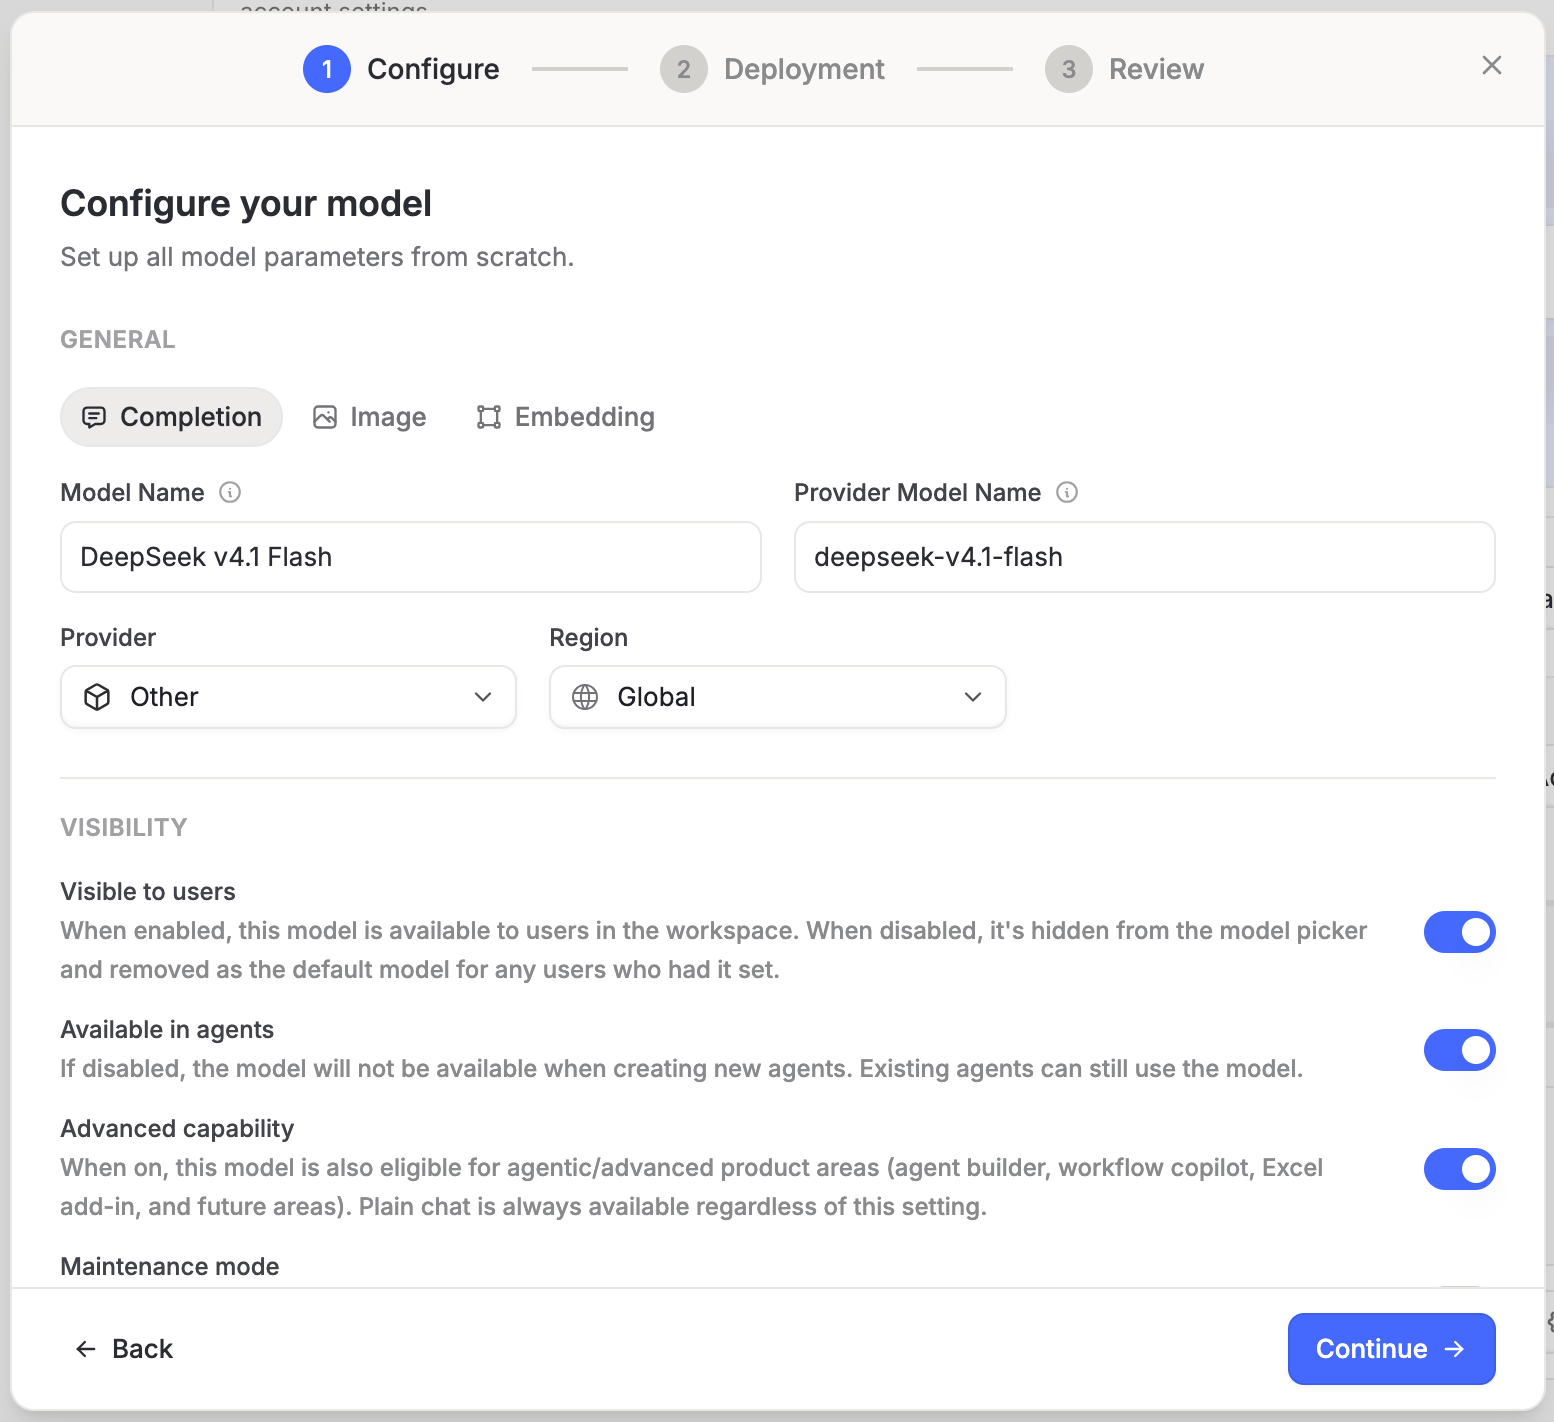
Fill in the **Configure** step:
| Field | Value |
| - | - |
| Type | **Completion** |
| Model Name | Display name shown to users, e.g. `DeepSeek v4.1 Flash` |
| Provider Model Name | The model ID exactly as you would call it on Requesty, e.g. `deepseek-v4.1-flash` |
| Provider | **Other** |
| Region | **Global** (or **EU** if you used the EU router URL) |
Leave **Visible to users**, **Available in agents**, and **Advanced capability** enabled unless you want to restrict the model. Click **Continue**.
### 3c. Configure the model
Fill in the **Configure** step:
| Field | Value |
| - | - |
| Type | **Completion** |
| Model Name | Display name shown to users, e.g. `DeepSeek v4.1 Flash` |
| Provider Model Name | The model ID exactly as you would call it on Requesty, e.g. `deepseek-v4.1-flash` |
| Provider | **Other** |
| Region | **Global** (or **EU** if you used the EU router URL) |
Leave **Visible to users**, **Available in agents**, and **Advanced capability** enabled unless you want to restrict the model. Click **Continue**.
 A bare name like `deepseek-v4.1-flash` is a [Managed Policy](/features/managed-policies): Requesty picks the best provider for that model on every request and handles fallbacks for you. Append `@eu` (e.g. `deepseek-v4.1-flash@eu`) to keep routing on EU-hosted endpoints. To pin a specific provider instead, use the `provider/model-name` ID from the [Model Library](https://app.requesty.ai/model-list), for example `anthropic/claude-sonnet-4-6`. Custom policies from your organisation work too with their `policy/` prefix.
### 3d. Configure the deployment and test
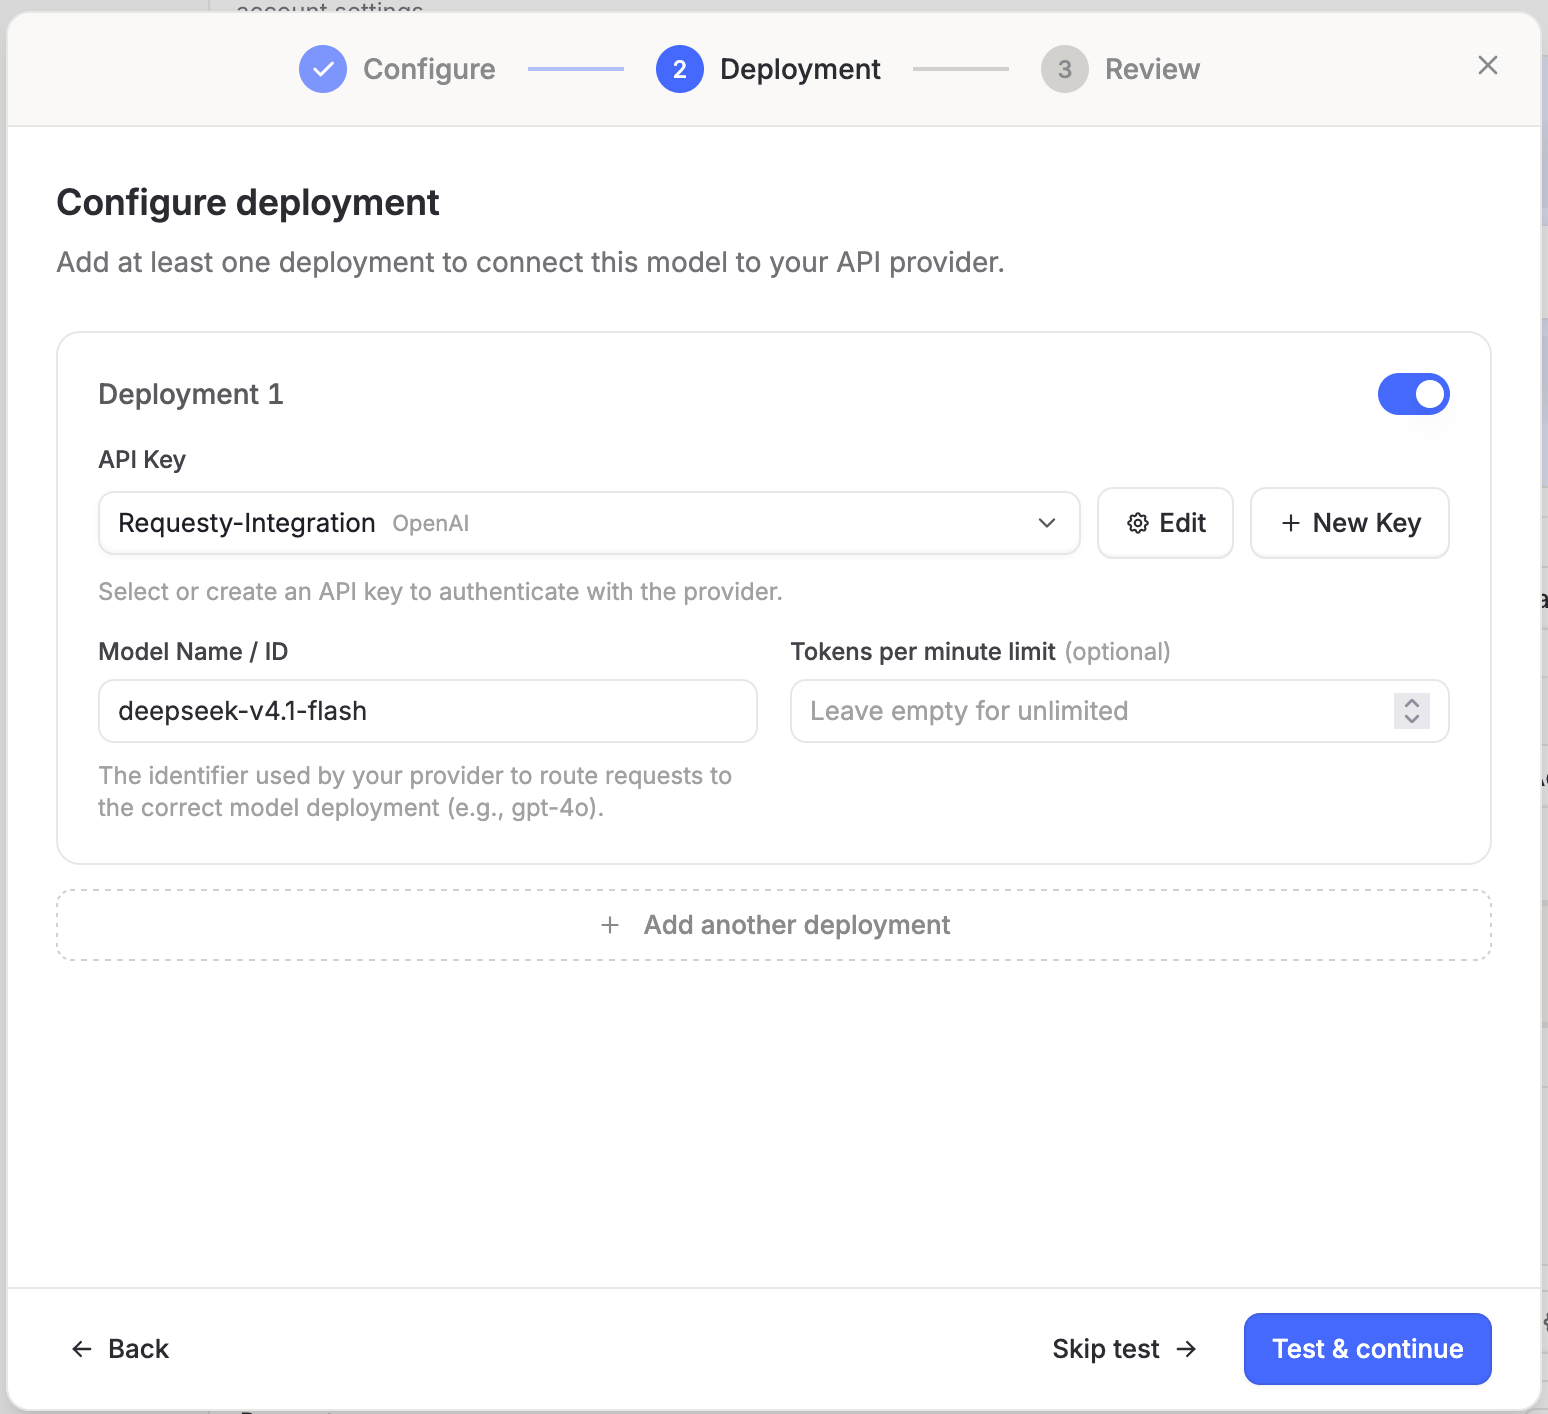
On the **Deployment** step:
1. Under **API Key**, select the Requesty key you created in step 2.
2. Set **Model Name / ID** to the same Requesty model ID.
3. Leave **Tokens per minute limit** empty unless you want Langdock to rate-limit this model.
4. Click **Test & continue**. Langdock sends a test request through Requesty and moves to the **Review** step on success.
A bare name like `deepseek-v4.1-flash` is a [Managed Policy](/features/managed-policies): Requesty picks the best provider for that model on every request and handles fallbacks for you. Append `@eu` (e.g. `deepseek-v4.1-flash@eu`) to keep routing on EU-hosted endpoints. To pin a specific provider instead, use the `provider/model-name` ID from the [Model Library](https://app.requesty.ai/model-list), for example `anthropic/claude-sonnet-4-6`. Custom policies from your organisation work too with their `policy/` prefix.
### 3d. Configure the deployment and test
On the **Deployment** step:
1. Under **API Key**, select the Requesty key you created in step 2.
2. Set **Model Name / ID** to the same Requesty model ID.
3. Leave **Tokens per minute limit** empty unless you want Langdock to rate-limit this model.
4. Click **Test & continue**. Langdock sends a test request through Requesty and moves to the **Review** step on success.
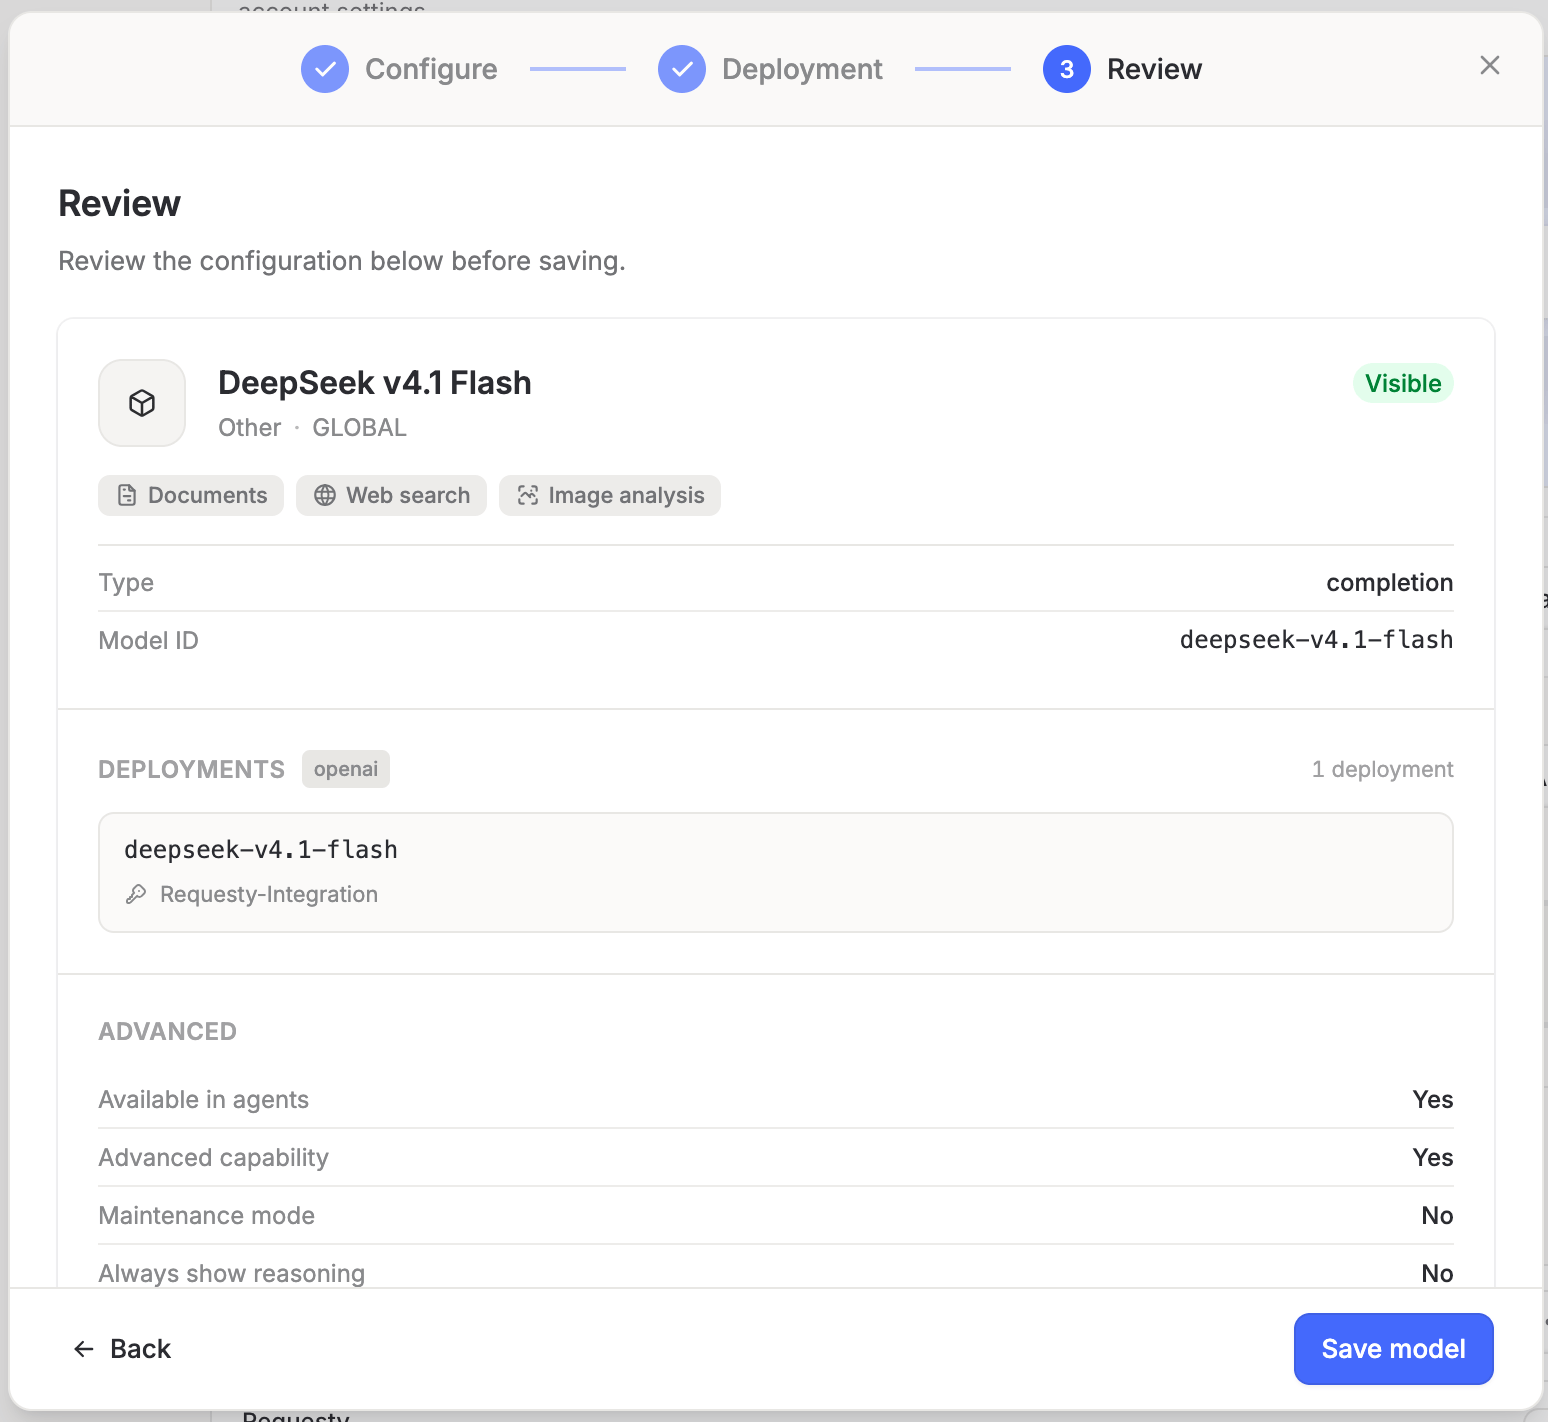
 Check the summary on the **Review** step and click **Save model**.
 Repeat this section for every model you want to offer. Each one reuses the same Requesty key, so you only manage a single credential.
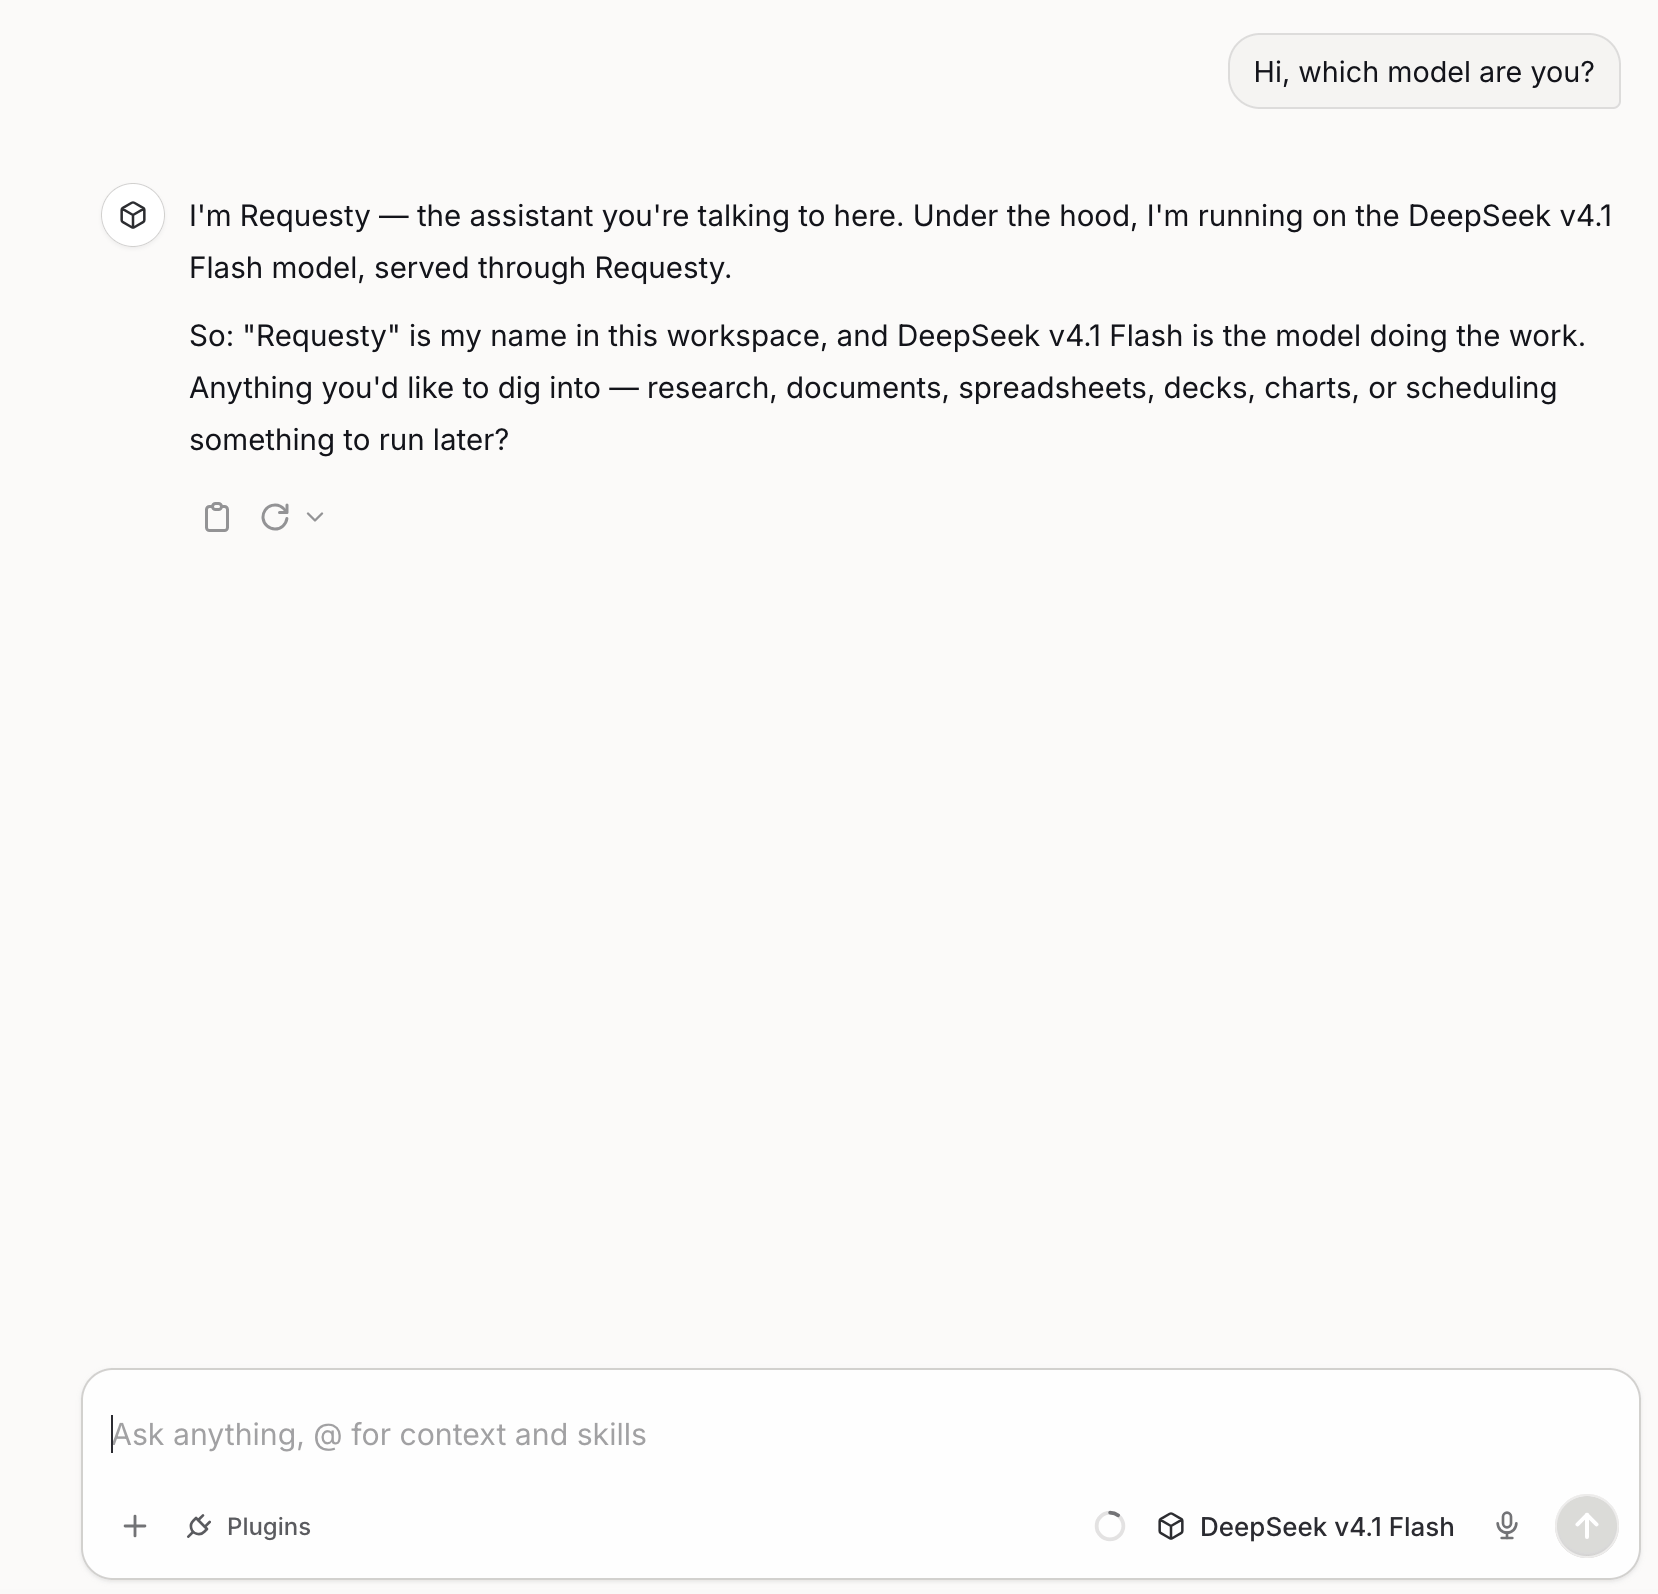
## 4. Test in chat
Open a new chat in Langdock, pick the model from the model selector, and send a message. The response is served through Requesty and shows up in your [Requesty logs](https://app.requesty.ai/logs) and [analytics](https://app.requesty.ai/analytics).
Repeat this section for every model you want to offer. Each one reuses the same Requesty key, so you only manage a single credential.
## 4. Test in chat
Open a new chat in Langdock, pick the model from the model selector, and send a message. The response is served through Requesty and shows up in your [Requesty logs](https://app.requesty.ai/logs) and [analytics](https://app.requesty.ai/analytics).
 ## Troubleshooting
* **Test & continue fails**: confirm the **Model Name / ID** matches an entry in the [Model Library](https://app.requesty.ai/model-list) and that the key is allowed to use it under [Approved Models](/features/approved-models).
* **401 Unauthorized**: the API key was pasted incorrectly or has been revoked. Edit the key under **Keys** and paste it again.
* **Model missing from the chat selector**: make sure **Visible to users** is enabled on the model and that the deployment toggle is on.
## Resources
* [Langdock Help Center](https://docs.langdock.com)
* [Requesty Model Library](https://app.requesty.ai/model-list)
* [Requesty API Keys](https://app.requesty.ai/api-keys)
* [Requesty Platform](https://app.requesty.ai)
This documentation is built and hosted on [Mintlify](https://mintlify.com), a developer documentation platform.
## Troubleshooting
* **Test & continue fails**: confirm the **Model Name / ID** matches an entry in the [Model Library](https://app.requesty.ai/model-list) and that the key is allowed to use it under [Approved Models](/features/approved-models).
* **401 Unauthorized**: the API key was pasted incorrectly or has been revoked. Edit the key under **Keys** and paste it again.
* **Model missing from the chat selector**: make sure **Visible to users** is enabled on the model and that the deployment toggle is on.
## Resources
* [Langdock Help Center](https://docs.langdock.com)
* [Requesty Model Library](https://app.requesty.ai/model-list)
* [Requesty API Keys](https://app.requesty.ai/api-keys)
* [Requesty Platform](https://app.requesty.ai)
This documentation is built and hosted on [Mintlify](https://mintlify.com), a developer documentation platform.